
Administration & Team Setup
Download the setup guide for Phase 1
Phase 1: Administration & Team Setup
Organizational Settings: First, let’s confirm and edit your company details.
Go to Administration>Organizational Settings
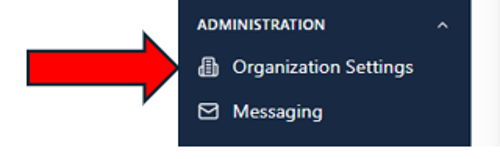
Organizational Settings: Navigation Header
At the top, you can navigate to other management sections:
- Settings | Billing | Integrations | Legal | Design Center
Note: Each card includes an Edit button in the top-right corner, allowing for quick updates to those specific details.
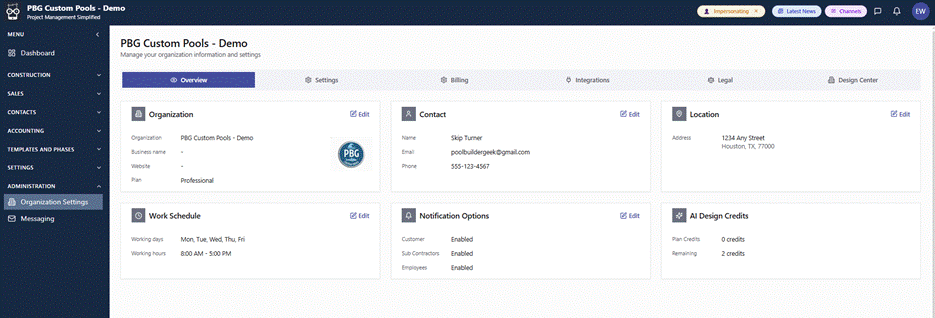
This screen is the Overview dashboard for your organization, where an administrator can manage organization settings and view high-level account details.
The dashboard is organized into six primary information cards:
- Organization: Here you can edit the Organization, Business Name, website address, and logo.
- Contact: Lists the primary contact’s name, email, and phone number.
- Location: The physical address of your business.
- Work Schedule: BY default, the work schedule is set to Monday through Friday, from 8:00 AM to 5:00 PM.
- Notification Options: Notifications can be Enabled or Disabled for Customers, Subcontractors, and Employees.
- AI Design Credits Balance: This shows how many design credits your plan includes, and how many are remaining.
- Team & Groups: Add team members
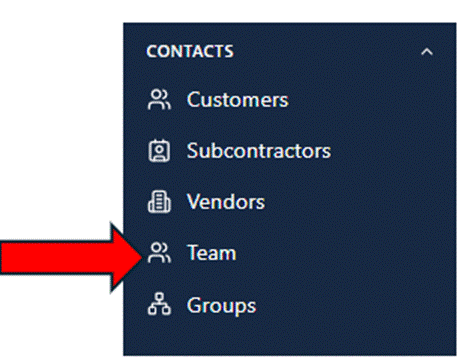
This screen is the Team Members management page, which allows administrators to view, search, and organize staff roles within the organization.

Search and Filter: Users can find specific staff using a search bar or filter the list by All Departments and member status (currently set to Active).
- View Options: The interface allows switching between a Table view (currently active) and a Cards view.
- + Add Team Member Clicking the + Add Team Member button opens a setup form to register a new employee with the following details:
Required Information
- Basic Identity: You must provide a First Name, Last Name, and Email address.
- Permissions: You are required to select a Role from the dropdown menu to determine the user’s access level within the system.
- Fields are available for Employee Number, Job Title, Department, and designating who the individual Reports To.
- Personal Contact: You can enter a Phone number and a full Street Address, including Community, City, State, and Zip.
- Login Credentials: User Name allows you to set a specific login ID for the member.
- Status and Notifications
- At the bottom of the form, you can toggle global settings for the new member:
- Active: Set the account to active or inactive status.
- Email/SMS Notifications: Enable or disable automated alerts sent to the member via email or text message.
- Once all details are entered, click Create Team Member to save the profile.
To edit an existing team member profile, click on the three-dot action icon on the far right of any individual listed in the Team Members table.
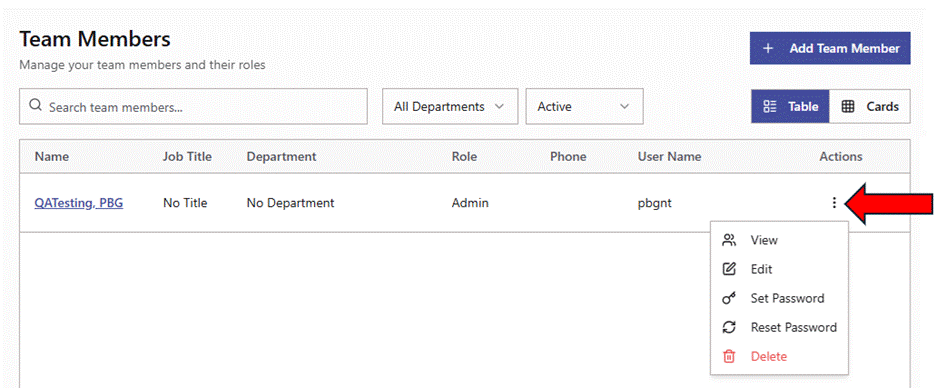
This menu provides administrators with several options for managing an existing team member’s profile and account access.
Menu Options
- View: Opens the team member’s full profile for a read-only overview of their current information.
- Edit: Allows you to modify any existing details, such as their Job Title, Department, Role, or contact information.
- Set Password: Enables an administrator to manually create and assign a specific password for the user’s account.
- Reset Password: Triggers a system-generated process to reset the user’s current password, typically used if a member has forgotten their credentials.
- Delete: Permanently removes the team member from the organization’s system
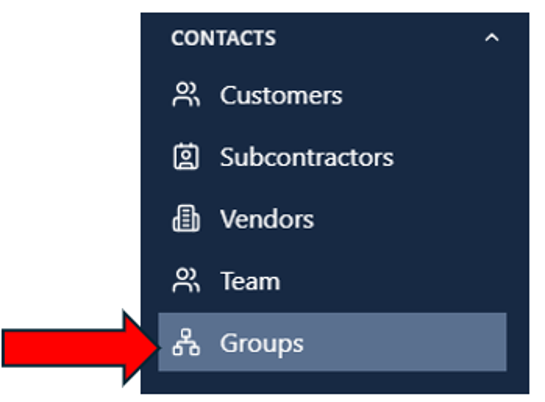
- Groups: The Groups management screen is designed to help you organize contacts into logical units, which can also function as communication channels. This interface provides a high-level overview of existing groups and tools for creating new ones.
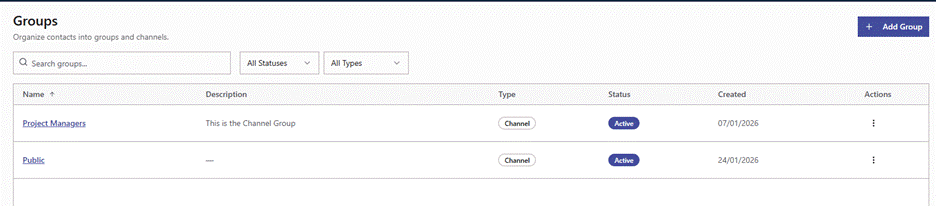
Groups Dashboard Overview
The main dashboard displays a table of all registered groups with the following details:
- Name: The identifying title of the group (e.g., “Project Managers” or “Public”).
- Description: A brief summary of the group’s purpose.
- Type: Indicates how the group functions, such as a Channel for messaging.
- Status: Shows whether the group is currently Active or inactive.
- Created: The date the group was originally established.
- Actions: A three-dot menu allows management tasks such as editing or deleting the group.
Search and Filtering Tools
To efficiently manage large numbers of groups, use the top navigation tools:
- Search Bar: Quickly find a group by typing its name into the “Search groups…” field.
- Status Filter: View groups based on their current state (e.g., Active, Inactive) using the dropdown of the All-Statuses dropdown.
- Type Filter: Sort the list by group functionality using the All-Types dropdown.
Understanding Group Types
- Standard Groups: Use this type when you need to organize team members for administrative or reporting purposes without necessarily creating a dedicated chat space.
- Best for: Filtering team lists by department, assigning permissions to specific blocks of users, or organizing staff for internal project tracking.
- Messaging Channels: Use this type when the primary goal is real-time communication between members.
- Best for: Collaborative project discussions, department-wide announcements, or creating a persistent “chat room” for specific topics.
Creating a New Group
To establish a new group or messaging channel, click the + Add Group button located at the top right of the screen.
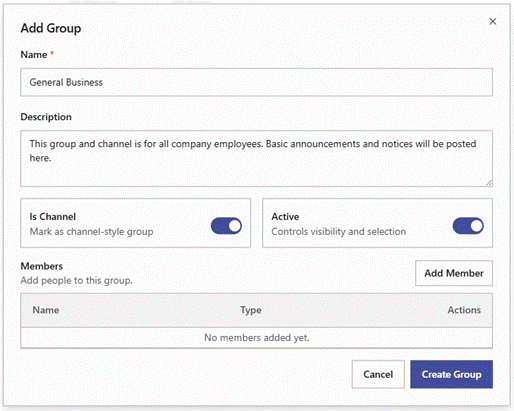
How to Assign Team Members to a Group
Once you have defined the basic group details such as the Name and Description, you can manage individual access in the Members section.
1. Locate the Members Section
- Navigate to the bottom portion of the group setup form labeled Members.
2. Add a New Member
- Click the Add Member button located at the top right of the Members table.
- This opens a selection tool or dropdown where you can choose from your existing team member list.
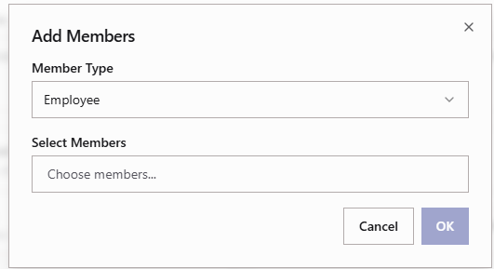
3. Review of the Member List
- The Members table provides a quick overview of who is in the group:
- Name: Displays the team member’s full name.
- Type: Indicates the member’s specific designation or status within this group.
- Actions: Provides options to manage or remove a specific individual from the group.
4. Finalize the Group
- After adding all necessary team members, ensure the Active toggle is enabled to make the group visible and functional for those assigned.
- If you want this group to function as a messaging channel, ensure the Is Channel toggle is switched on.
- Click Create Group (or Save Changes) to finalize the assignments.
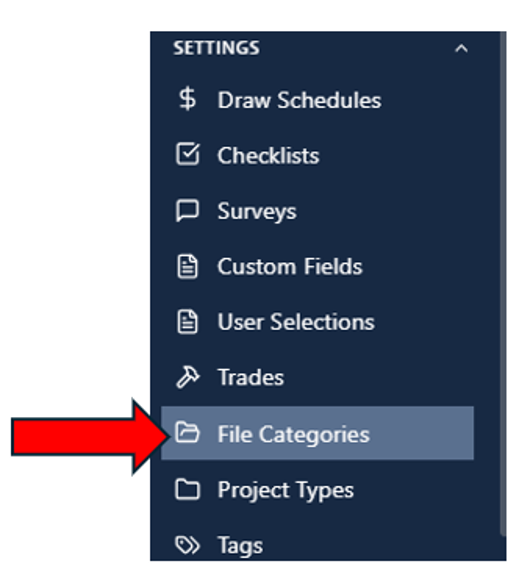
- Settings>File Categories: Here you will add common file types used for your organization. Examples include Permits, 3d Renderings, and Contracts. You will also be able to set which user roles can access each file types.
- The main table displays an inventory of your organization’s file classifications and their corresponding permissions:
- File Category Name: Lists specific document types such as Change Order, Contract, Customer Document, Invoice, and Other.
- Roles: Displays the specific user groups (e.g., Admin, Superintendent, Sales, Customer) authorized to view or manage files within that category.
- Restricted: Indicates if the category has additional security constraints (
- Actions: Features a three-dot menu for editing or deleting category settings.
- Navigation and Controls
- Search and Filter: A search bar at the top left allows you to quickly locate specific categories by name.
- View Options: You can toggle the display between a Table view (currently active) and a Cards view using the buttons on the right.
- Add Category: Click the + Add Category button located at the top right to create new file classifications.
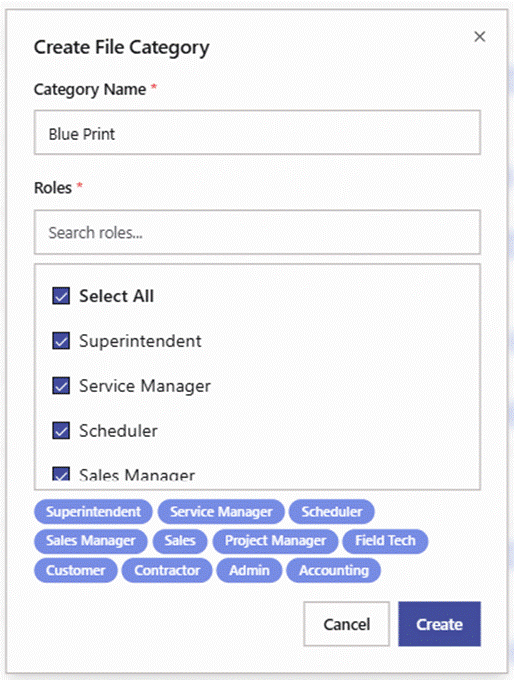
File Category Details
- Category Name: A required text field used to label the new document type, such as “Blueprint”.
- Roles: A required section that determines which user groups can access files uploaded under this category.
- Create: A blue button to save the new category and apply the assigned role permissions.