
Sales Setup
Download this Setup Guide
This section focuses on Sales Setup, which establishes the core infrastructure for managing leads and sales workflows. This phase ensures that your sales team has standardized templates, checklists, and web integration tools necessary to move prospects through the pipeline efficiently.
Templates and Phases>Sales Phases
The Sales Phases management screen serves as the primary dashboard for defining and organizing the distinct stages of your sales workflow. By standardizing these phases, your organization can track leads consistently.
Add Phase: Click the blue + Add Phase button in the top-right corner to define a new phase:
This screen is the Create New Sales Phase window, which is used to define and configure a specific stage in your sales lifecycle.
The General tab contains the foundational settings for the sales stage:
Name: Enter a clear title for the stage, such as “Lead In” or “1st Sales Consult”.
Description: Use this text area to define the primary goals or standard operating procedures for this phase.
Checklists: Use the dropdown to link specific sales checklists (e.g., lead qualification forms) that must be completed during this stage.
Color: Assign a hex color code to visually distinguish this phase in your pipeline and calendar views.
Days to Complete: Set the expected duration for this stage to help calculate the total length of your sales cycle.
Milestone: Check the Phase Milestone box if this stage represents a significant achievement in the sales process.
Create Sales Phase: Saves the new stage and adds it to your organization’s active sales workflow.
Templates and Phases>Templates
The Sales Templates dashboard is a central workspace used to build and organize standardized workflows for your sales team. By grouping Sales Phases into templates, you ensure every lead follows a consistent path from initial inquiry to a finalized contract.
Interface Overview
The screen is organized into three primary columns to help you manage and sequence your sales activities:
Templates Sidebar (Left Panel)
This area acts as a library for your organization’s saved sales workflows.
- Click the “+” icon to create a new template.
Use the three-dot menu to edit or delete a specific template.
Sales Phases Sequence (Center Panel)
When a template is selected, this column shows the active progression of stages.
- Workflow Order: Phases are listed in the order they will occur (e.g., Lead In → 1st Sales Consult → Design).
- Reordering: Use the six-dot handle on the left of any phase card to drag and drop it into a new position in the sequence.
- Phase Indicators: Cards display linked data, such as the number of attached checklists and the “Parent” phase (the stage that must be completed first).
- Milestones: A flag icon next to a phase name indicates it has been designated as a critical project milestone.
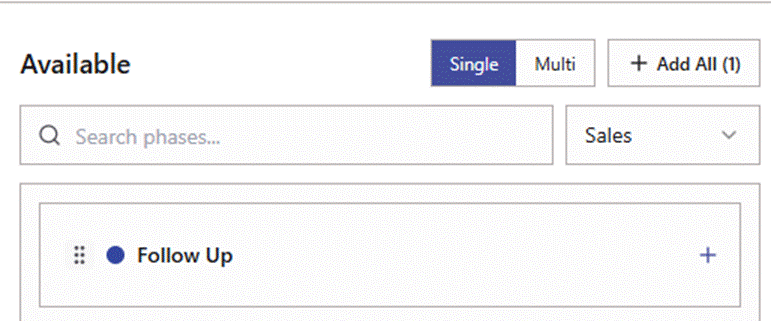
Available Phases (Right Panel)
This column contains your inventory of individual sales stages that can be added to your template.
- Search and Filter: Use the search bar or the category dropdown (e.g., “Sales”) to find specific phases.
- Bulk Actions: Use Multi mode to select and add several phases at once, or click + Add All to move the entire filtered list into your template.
Best Practices for Templates
- Integrate Checklists: Attach checklists to critical phases (like Design or Proposal) to ensure sales reps collect all necessary documentation before moving forward.
- Designate Milestones: Flag the most important stages so you can easily track conversion rates across your different templates.
Settings>Checklists: To add Checklists for Sales, follow the same steps covered in Phase 2.
Sales Custom Fields
Sales Lead Widget
The Sales Leads Widget allows builders with a public-facing website to capture prospect information and automatically add those leads to Pool Builder Geek. This feature generates a small HTML snippet that can be embedded into any web page, creating a lead form that, when submitted, instantly populates the Leads section of the application.
Setting Up Your Digital Leads Widget
To begin, you’ll first configure or create a Custom Fields Form that defines which fields will appear on your website’s lead form.
Step 1: Access Custom Fields
- In Pool Builder Geek, go to Settings → Custom Fields.
- The Digital Leads Widget comes preloaded with standard contact form fields, but you can add custom fields to capture additional information such as budget, desired pool shape, or other preferences.
- You can either use an existing Custom Fields Form or create a new one for your widget.
Step 2: Create a New Custom Fields Form
- Click the + button next to Custom Fields.
- Enter a Name/Description that identifies the purpose of the form (such as Web Contact Details) , then click Create Custom Field Form. (Keep in mind, this title will appear on the form)
- Once created, select your new form from the list on the left-hand side.
Click + Add Field in the upper-right corner.
Step 3: Add Custom Fields
- Enter a Field Name.
- Choose a Field Type from the following options:
- 5 Star – Rating input
- Date – Calendar date
- Datetime – Date and time selection
- Dropdown – Multiple-choice picklist
- Money – Dollar amount entry
- Multi-Line Text – Paragraph-style text box
- Text – Single-line text field
- Yes/No – Simple yes or no choice
- If using the Dropdown type:
- Click + Add Option to create your first choice.
- Enter a short label for the option.
- Repeat this process until all dropdown options are added.
- Toggle Required Field to On if the field must be filled out before submission.
- Click Create Field to save it.
- Repeat these steps until you’ve added all desired fields.
Step 4: Generate Your Digital Leads Widget
Your Leads Widget is linked to a specific Sales Template, allowing you to create multiple contact form widgets for different purposes. For example, you might use one widget for new pool construction leads and another for service requests. Each widget is tied to its corresponding Custom Field Template and Sales Template.
- Once your Custom Field form is complete, navigate to the Settings section and click Sales Templates.
- Choose the Template you wish to utilize with your Web Leads.
- Click the Options
button next to the form name.
- Click Edit.
- Click the Custom Fields dropdown and select the desired Custom Fields form.
- Click Update Template.
- Now click the Options
button
- Click Sales Lead Widget.
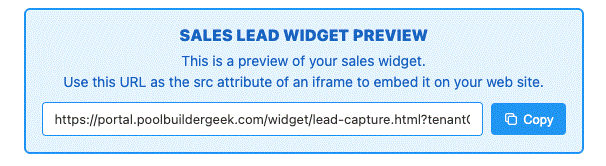
- A new tab will open, displaying your customized lead form preview.
- At the top of the screen, you’ll see a blue instruction box with the form’s embed URL.
- Click Copy to copy the URL.
- Paste it into an email, notepad, or other document to share with your website developer.
Step 5: Embed the Widget on Your Website
Your developer can now embed the form by placing the provided URL inside an iFrame on your website. Once published, visitors can complete the form, and new leads will automatically appear in your Leads list within Pool Builder Geek.