
Construction Setup
Download this Setup Guide
This section outlines the essential steps for configuring your construction environment. Following these phases ensures that your projects, subcontractors, and workflows are standardized for maximum efficiency
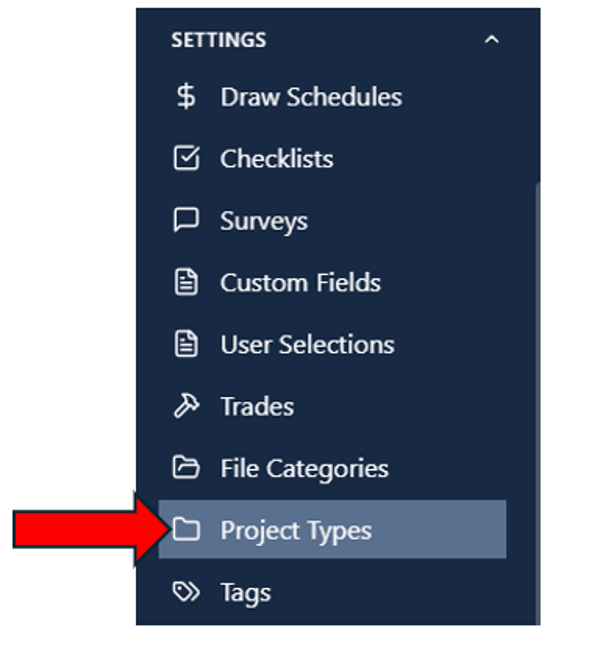
Settings>Project Types
Here we will add your Project Types
This screen is the Project Types management dashboard, designed to help you categorize and organize your work projects.
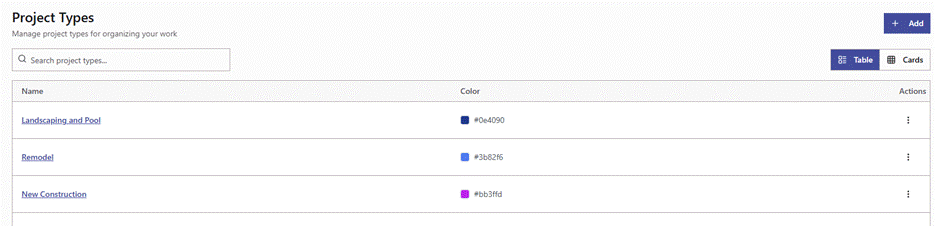
- Project Type: Examples: Pool and Spa, Landscaping, Remodel
- Click+ Add: to create new project categories
- Click+ Add: to create new project categories
- Name: Enter a descriptive name for the category (e.g., “Remodel” or “New Construction”).
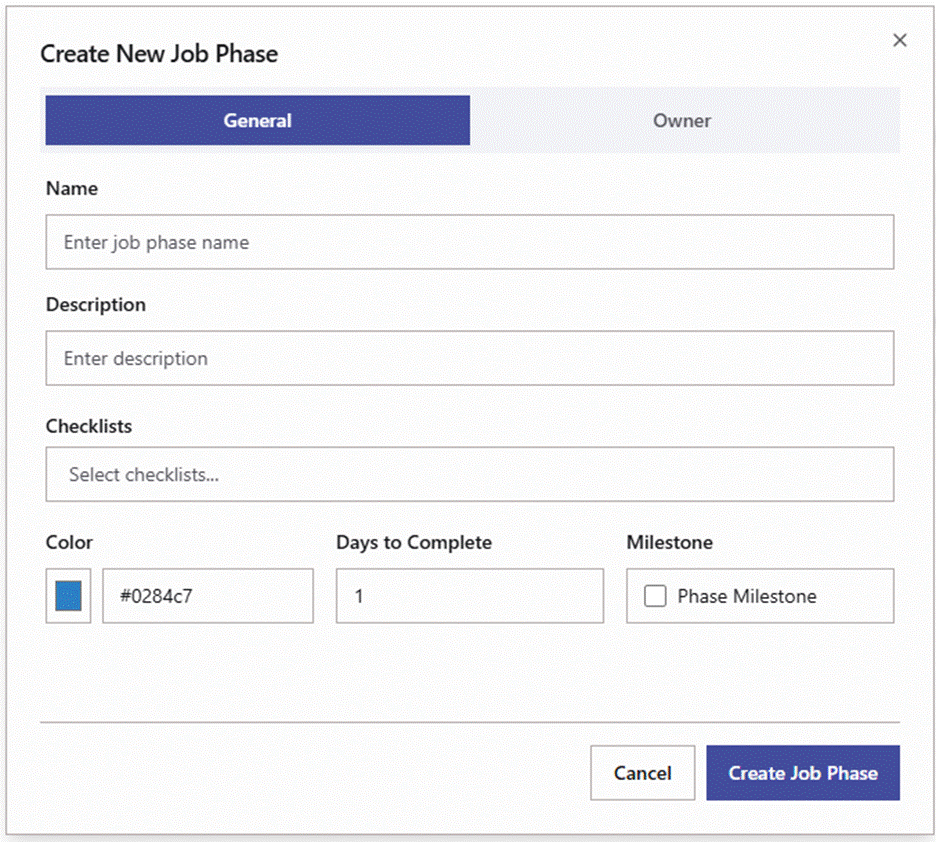
- Click Create Project Type to save the new category and add it to your active inventory.
- Contacts>Subcontractors
Here we will add your subcontractors.
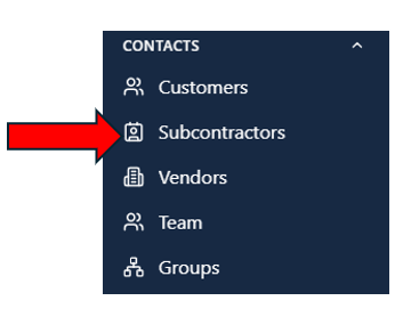
This screen is the Subcontractors management dashboard.

Adding Subcontractors
Click the blue + Add Subcontractor button in the top-right corner.
In the Create New Subcontractor window, provide the foundational business information:
- Name: Enter the official company name of the subcontractor (e.g., “Champion Plumbing”).
Address Information: Complete the physical location details, including Street Address, Community, City, State, and Zip. Ensure the correct Country is selected from the dropdown menu.
Contact Information: Enter the First Name, Last Name, Phone number, and Email address for primary contact.
App Access: Assign a unique Username and a secure Password to allow the subcontractor to log into their portal.
Click the Create Subcontractor button to save the record to your roster.
Editing Use the three-dot icon to access individual management settings for a subcontractor record.
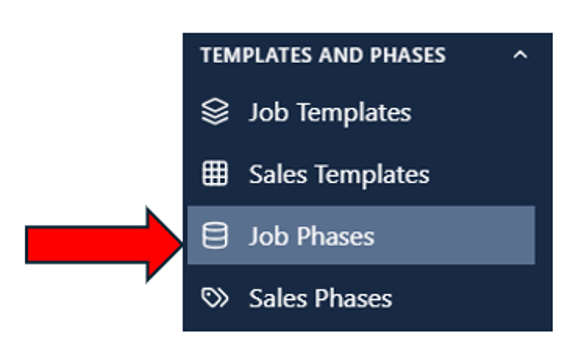
- Templates and Phases>Job Phases
Here we will add your Job Phases
The Job Phases dashboard serves as the central hub for managing and customizing the various stages of your project workflow. This interface allows you to define the timeline, description, and sequence of tasks for every construction project.
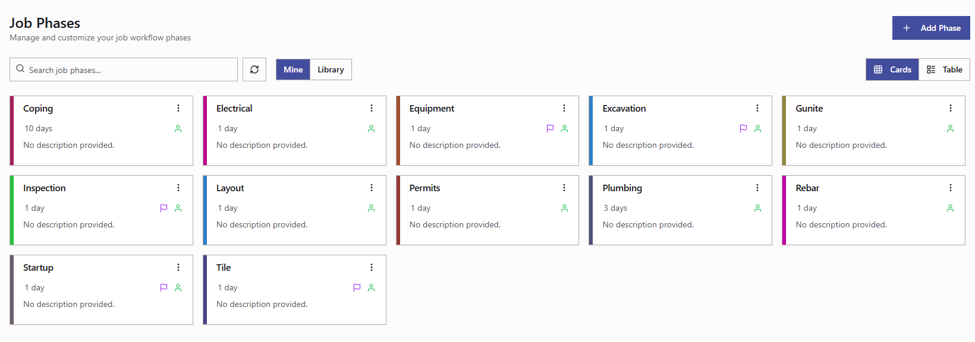
Add Phase: Click the blue + Add Phase button in the top-right corner to create a new workflow stage.
The Add Phase form is divided into two tabs, with the General tab containing the primary phase settings:
- Name: Enter a clear, descriptive title for the stage, such as “Excavation” or “Electrical”.
Description: Use this area to outline the specific work requirements or goals for this phase.
Checklists: Select any pre-defined quality control or task lists that must be completed during this stage. - Color: Assign a specific hex color code to help visually identify this phase on the master project schedule.
- Days to Complete: Define the estimated duration of the phase to help the system calculate the overall project timeline.
- Milestone: Check the Phase Milestone box if this stage represents a critical deadline or project turning point.
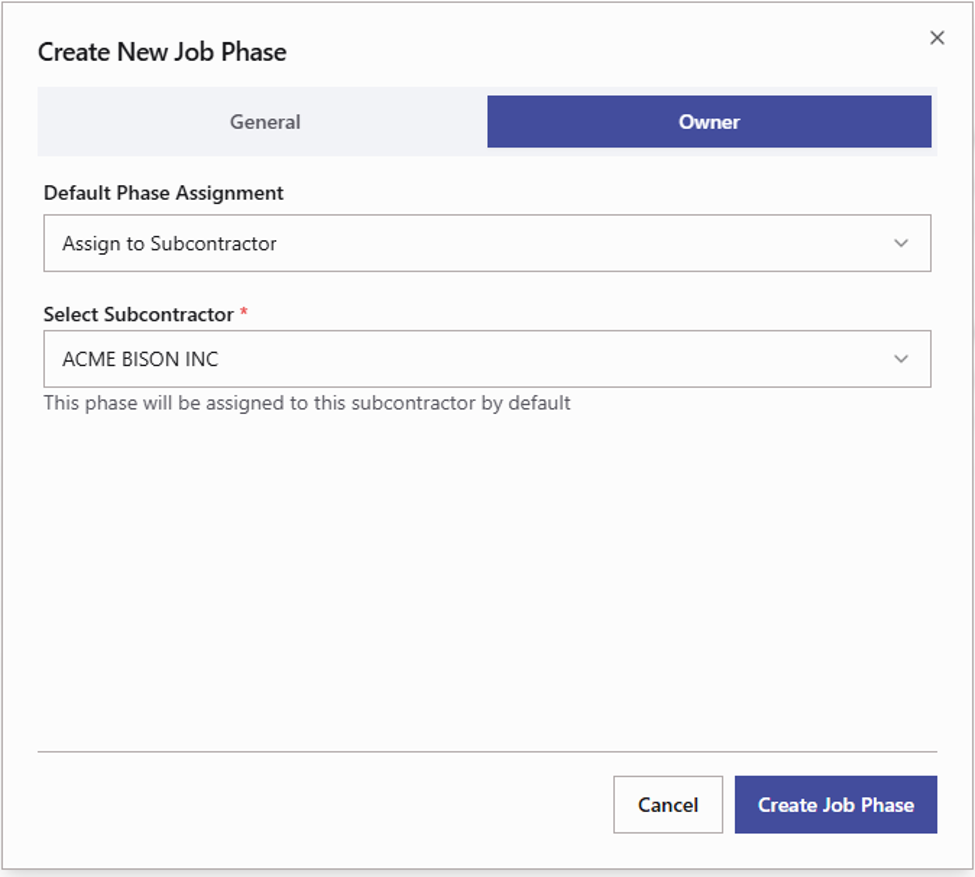
This screen is the Owner tab within the Create New Job Phase window.
Configuration Details
- Default Phase Assignment: A dropdown menu that allows you to choose the category of worker responsible for the phase, such as “Assign to Subcontractor”.
- Select Subcontractor: A required field where you choose a specific partner (e.g., ACME BISON INC) from your saved subcontractor roster.
- Automation Note: Once saved, this phase will be automatically assigned to the selected subcontractor by default whenever it is used in a project.
Create Job Phase: Saves and adds it to your active job phases.
- Templates and Phases>Job Templates
Here we will add your Job Templates
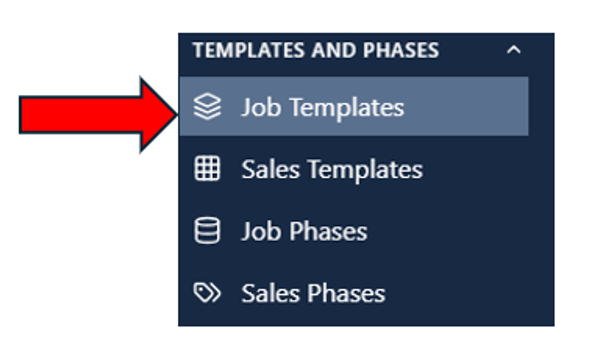
This screen is the Job Templates management dashboard, used to create and sequence standardized workflows for your projects. By organizing your Job Phases into templates, you can quickly launch new projects with a pre-defined schedule and task list.
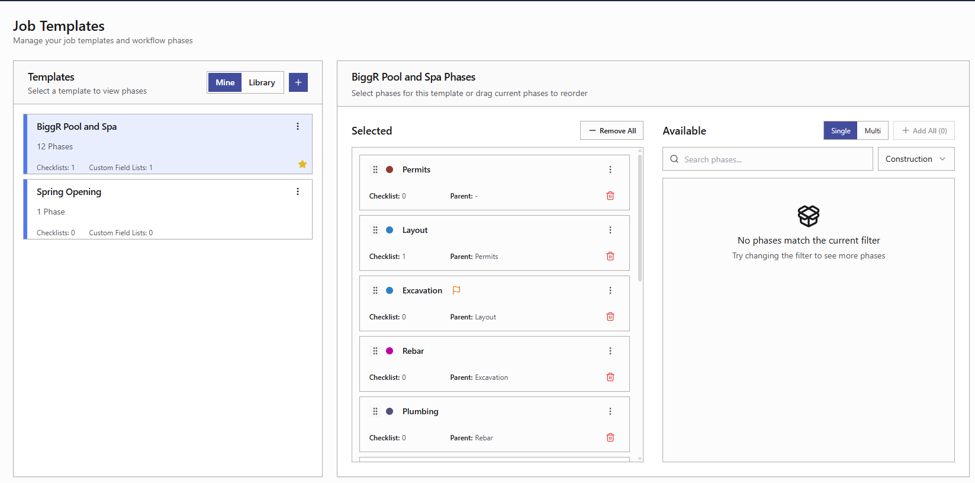
Templates Sidebar (Left Panel)
This panel acts as your master directory for saved workflows.
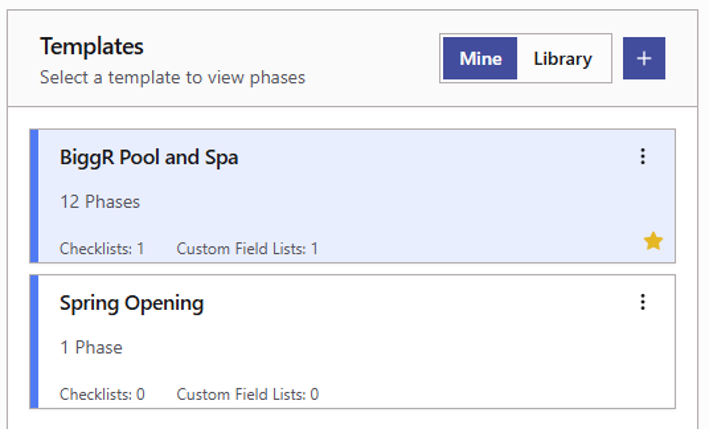
- Template Selection: View all organization-owned templates (e.g., “BiggR Pool and Spa”). Each entry shows the number of phases, checklists, and custom field lists included.
- Create New: Use the blue “+” icon to start a new template from scratch.
- Library: Switch to the Library tab to browse pre-made industry standard templates.
Building a Template
To build a standardized workflow:
- Select or Create a template in the left sidebar.
- Find Phases in the right column and click to add them to your template.
- Arrange the Order in the center column by dragging phases into their logical construction sequence.
- Click Save
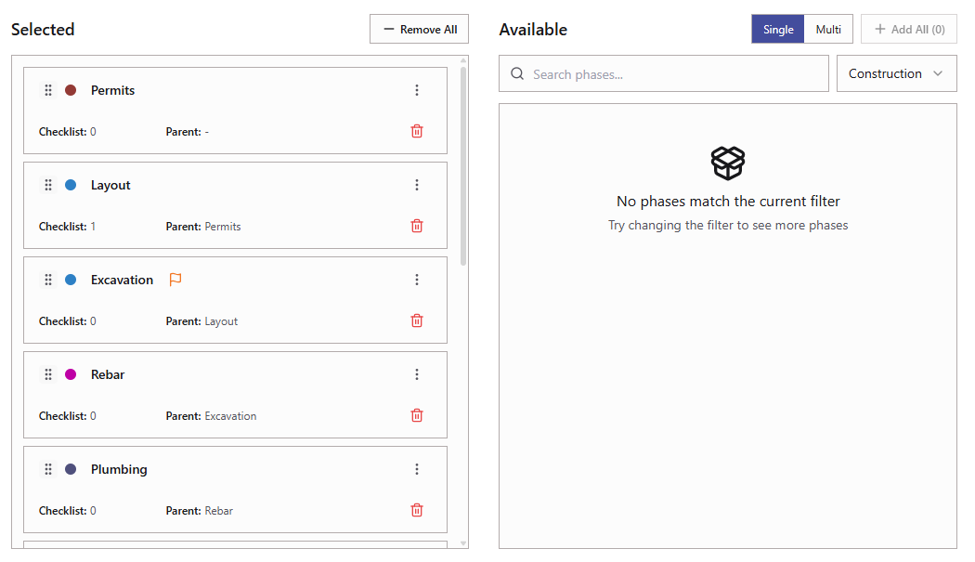
Selected Phases (Center Panel)
- Sequence Management: Use the six-dot drag handle on any phase card to reorder the workflow.
- Phase Details: Each card identifies the phase name (e.g., Layout, Rebar), its parent phase (for dependency tracking), and any attached checklists.
- Removal: Click the red trash icon on a card to remove that phase from the current template.
Available Phases (Right Panel)
This panel contains your inventory of individual job phases that can be added to the template.
- Search & Filter: Use the search bar or the category dropdown (e.g., “Construction”) to find specific phases.
- Selection Mode: Toggle between Single or Multi selection modes to add phases to your template one by one or in bulk.
Editing a Job Template Phase
The Edit Job Template Phase window allows you to fine-tune the behavior of a specific stage in your workflow.
- Phase: Displays the name of the phase you are currently editing (e.g., Layout).
Parent Phase: Defines the dependency for this stage. Use the dropdown menu to select which phase must be completed before this one can begin (e.g., Permits).
Pro Tip: Properly setting the Parent Phase(s) is crucial for generating a schedule projection of child phases (based on the number of days in each phase).- Days to Complete: Enter the estimated number of days required for this specific phase. This value is used to calculate the automated project timeline.
Checklists: To add a checklist, search for its name in the field.
Default Phase Assignment: Assign to Employee, Subcontractor, or Crew.
Select Subcontractor: Choose the specific company (e.g., ACME BISON INC) from your saved roster that should be assigned to this work by default.
- Save: Click the blue button at the bottom right to apply your changes to the template.
- Days to Complete: Enter the estimated number of days required for this specific phase. This value is used to calculate the automated project timeline.
- Settings>Draw Schedules
Here we will add your Draw Schedules
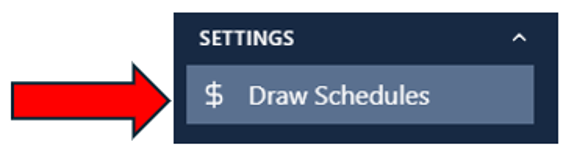
The Draw Schedules screen is used to define payment milestones for construction projects. This dashboard allows you to create custom Draw Schedules used by your organization. These are used when creating a new job, adding the contract amount, and picking the desired Draw Schedule.
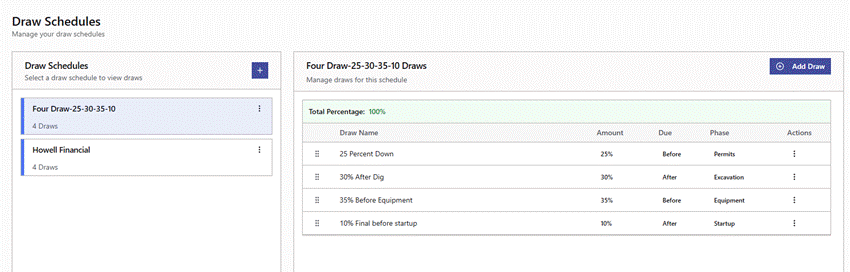
Dashboard Structure
The interface is split into two primary sections for selecting and managing specific payment plans:
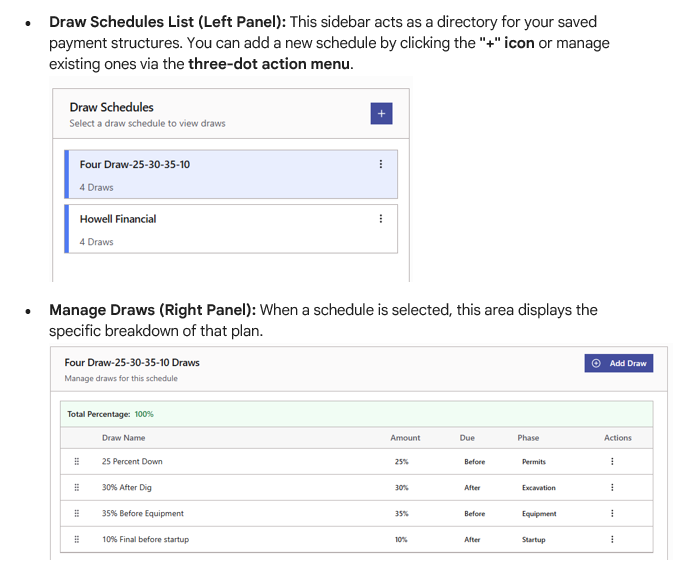
- Settings>Checklists
Here we will add your Checklists
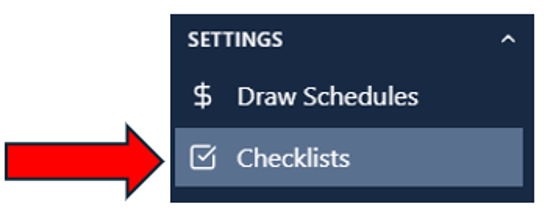
The Checklists management screen is designed to create and organize standardized lists for various business processes, such as construction or sales. The interface is divided into two main sections: a master directory of checklists and a detailed view of specific items within a selected list.
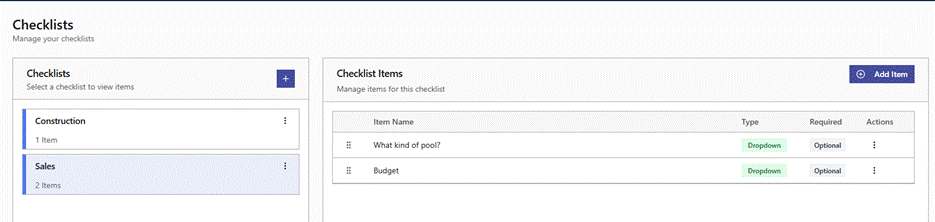
Checklists Directory (Left Panel)
This sidebar serves as the navigation hub for all saved checklists.
- Checklist Navigation: Users can select from existing lists, such as Construction or Sales, to view their specific requirements.
- Organizational Tools: Each checklist entry shows the number of items it contains.
- Management Controls:
- Add Checklist: Click the “+” button at the top of the panel to create a new master checklist.
- List Options: Use the three-dot menu on each list to edit or delete the master entry.
Checklist Items (Right Panel)
When a checklist is selected, this area allows for the granular management of its individual tasks or data points.
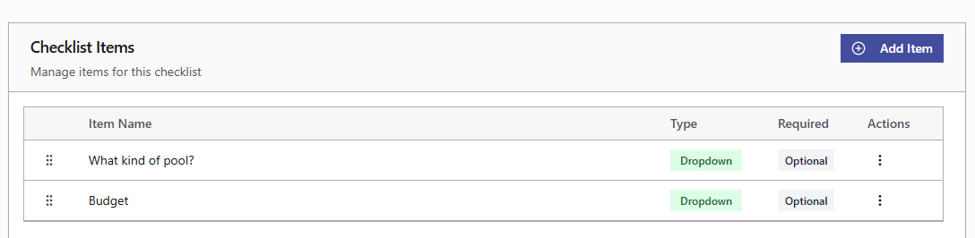
| Column | Description |
| Item Name | The specific question or task, such as “What kind of pool?” or “Budget”. |
| Type | The format of the input required (e.g., Dropdown). |
| Required | Indicates if the item is mandatory or Optional for the user to complete. |
| Actions | Features a three-dot menu for editing or removing the specific item. |
Configuration Actions
- Add Item: Click the “+ Add Item” button at the top right to insert a new requirement into the active checklist.
- Reorder: Use the six-dot handle to the left of each item name to drag and drop tasks into a specific sequence.
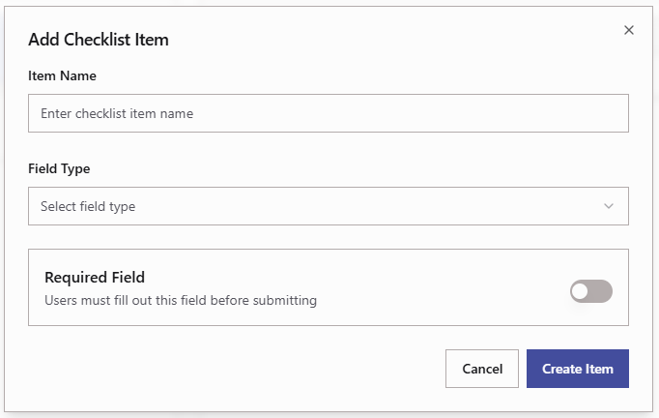
Item Name field (e.g., “Pool Dimensions” or “Final Electrical Inspection”). This is the label that will appear to the team member completing the checklist in the field.
Use the Field Type dropdown menu to choose how the user will provide their answer. Choosing the correct type ensures data consistency and makes the checklist easier to complete.
Available Field Types include:
5 Star: For quality ratings or satisfaction levels.
Date / datetime: To record specific project milestones or timestamps.
Dropdown: To provide a list of pre-defined options for the user to select from.
Money: For recording costs, budgets, or expenses.
Text / Multi-line Text: For brief notes or detailed observations.
Yes/No: For simple binary confirmations or “Pass/Fail” checks.
Set Mandatory Status
Create Item: Click the blue button at the bottom right to save the new requirement and add it to your active checklist.
- Settings>Custom Fields
Here we will add your Custom Fields
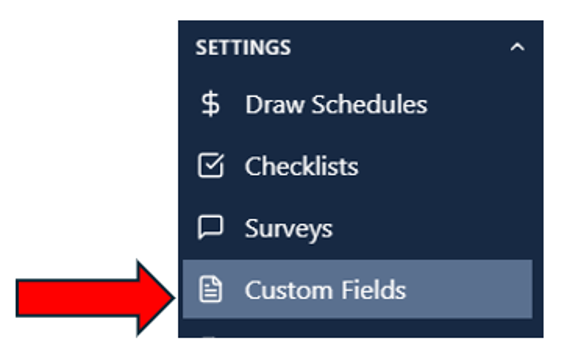
This screen is the Custom Fields management dashboard, a powerful tool that allows your organization to tailor the platform to your specific data-tracking needs. By creating custom fields, you can capture unique project details—such as specific swimming pool equipment or technical specifications—that aren’t included in the standard system.
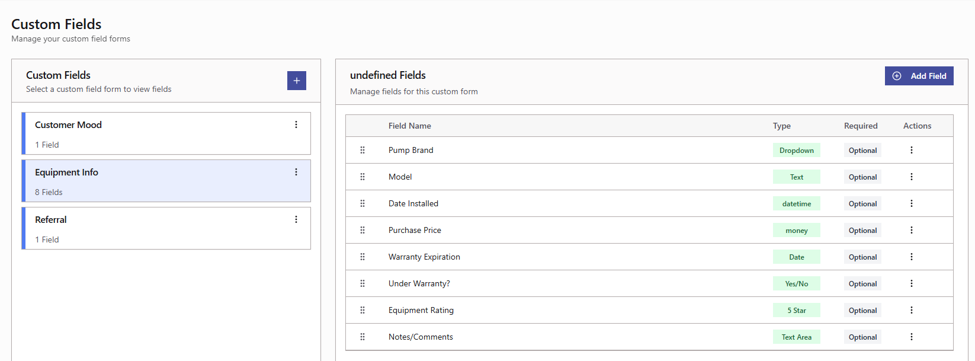
Custom Fields Overview
The dashboard is split into two functional areas to help you organize and manage your data points.
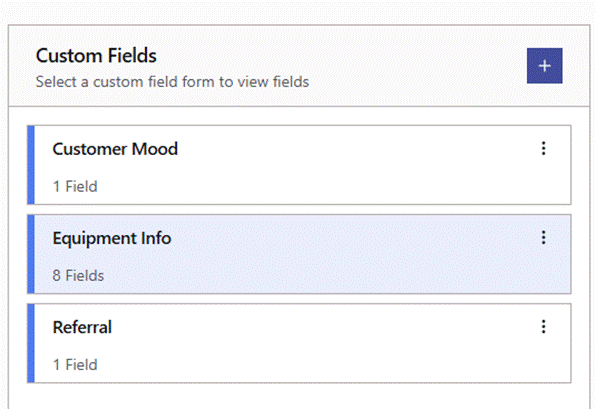
1. Left Panel: Custom Field Labels: Use the “+” icon to create a new category or the three-dot menu to edit or delete existing ones.
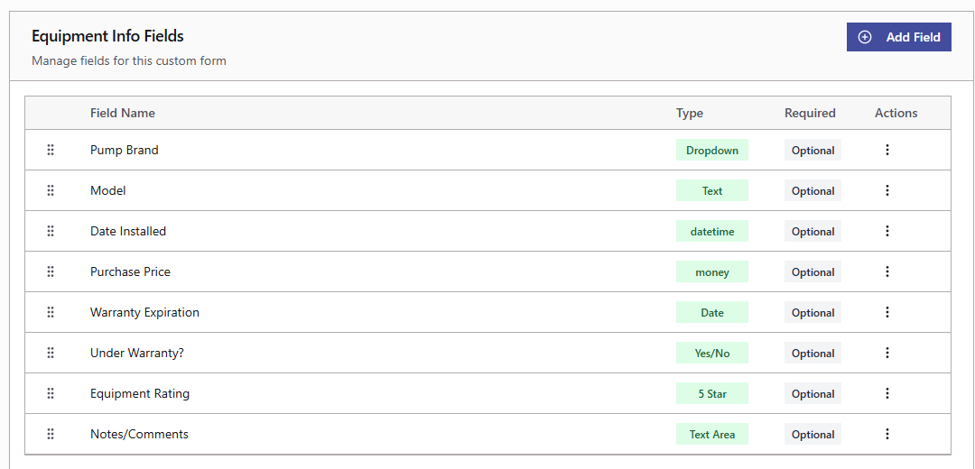
2. Field Management (Right Panel)
Once a category is selected, this area displays the individual data points you are tracking.
| Column | Description |
| Field Name | The label for the data point (e.g., “Pump,” “Filter,” “Heater”). |
| Type | The format of the data (e.g., Dropdown, Text, Date). |
| Actions | A three-dot menu to edit or remove a specific field. |
How to Create a New Data Category
- Navigate to the left-hand Categories panel.
- Click the “+” icon at the top of the list.
- Enter a name for your category (e.g., “Site Conditions” or “Warranty Info”).
How to Add a Custom Field
- Select the relevant Category from the left panel.
- Click the blue + Add Field button in the top-right corner of the screen.
- Define the Field:
- Field Name: Give the field a clear title.
- Field Type: Choose how users will enter data (e.g., select Dropdown for a list of equipment brands or Text for serial numbers).
- Click Create to save the field to your category.
Organizing Your Fields
You can change the order in which these fields appear to your team by using the six-dot drag handle to the left of any Field Name. Simply click and drag the field to its new position in the list.
- Settings>User Selections
Here we will add your User Selections
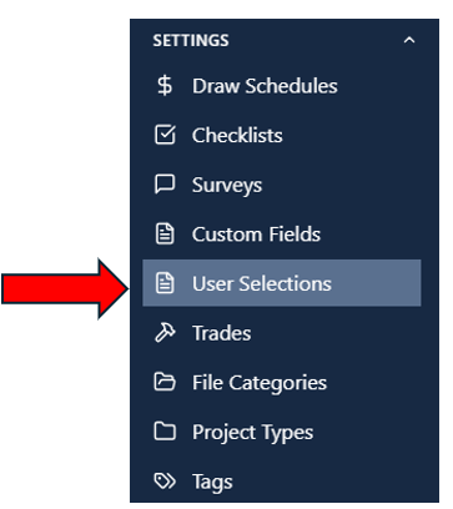
This screen is the User Selections management dashboard, designed to help you organize and define the specific options—such as materials, finishes, or upgrades—that customers can select for their projects, such as finishes, colors, or equipment.
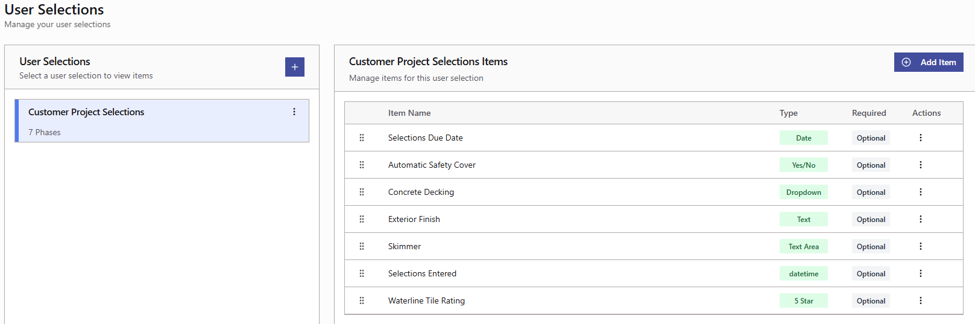
How to Manage User Selections
1. Navigate Your Selection Categories
The left panel serves as a directory for your selection groups.
- Select a Group: Click on a category (e.g., “Customer Project Selections”) to view and manage the individual items within that group.
- Add a New Category: Click the blue “+” icon at the top of the left panel to create a new category for grouping choices (e.g., “Kitchen Finishes” or “Pool Equipment”).
- Category Actions: Use the three-dot menu next to a category name to edit its title or delete it from your system.
2. Manage Selection Items
Once a category is selected, the right panel displays the specific data points or choices available to the customer.
- Review Item Details: Each row shows the Item Name, the input Type (e.g., Date, Yes/No, Dropdown), and whether the selection is Required or Optional.
- Add a New Item: Click the blue “+ Add Item” button at the top right to define a new choice for your customers.
- Edit or Remove: Click the three-dot menu in the Actions column to modify an existing item or delete it from the category.
Available Field Types include:
- 5 Star: For quality ratings or satisfaction levels.
- Date / datetime: To record specific timestamps.
- Dropdown: To provide a list of pre-defined options for the user to select from.
- Money: For recording costs, budgets, or expenses.
- Text / Multi-line Text: For brief notes or detailed observations.
- Yes/No: For simple binary confirmations or “Pass/Fail” checks.