Project Stop Route
How to Set Up Maintenance Routes & Add On-Demand Project Stops
This guide explains how to create a new Maintenance Route for a field maintenance technician and add on-demand project stops for them to complete.
Step 1: Create a New Maintenance Route
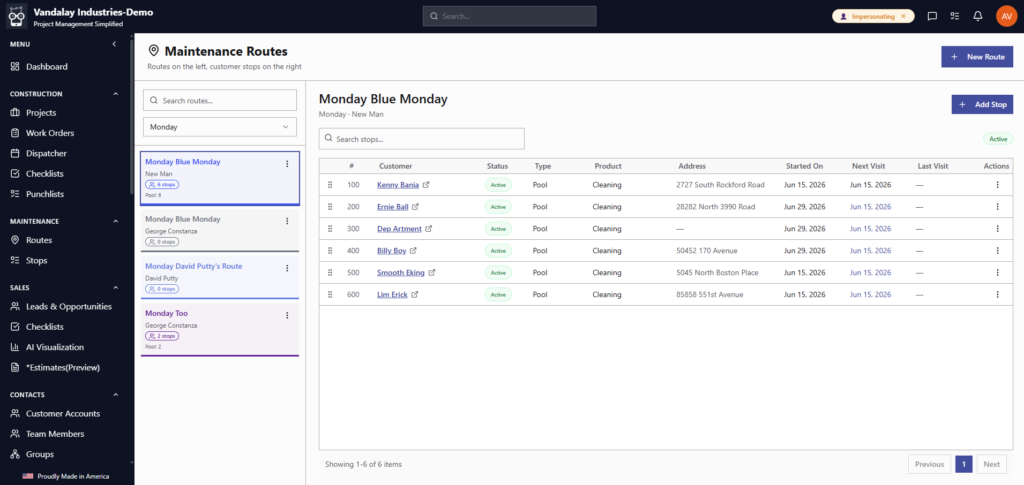
- Go to Maintenance > Routes in the left sidebar menu.
- Click the + New Route button in the top right corner.
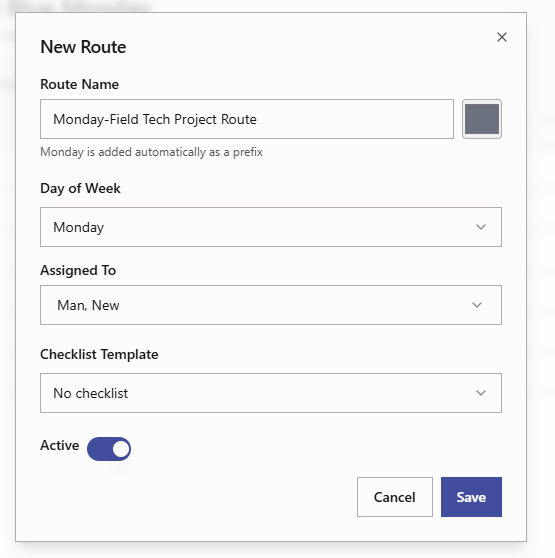
- In the New Route modal:
- Route Name: Enter a descriptive name (e.g., Field Tech Project Route). Note: The selected day of the week will automatically attach as a prefix.
- Day of Week: Select the scheduled day for this route (e.g., Monday).
- Assigned To: Choose the designated field technician (e.g., New Man).
- Checklist Template: Attach a checklist template if required, or leave as No checklist.
- Active: Ensure the toggle is set to Active.
- Click Save.
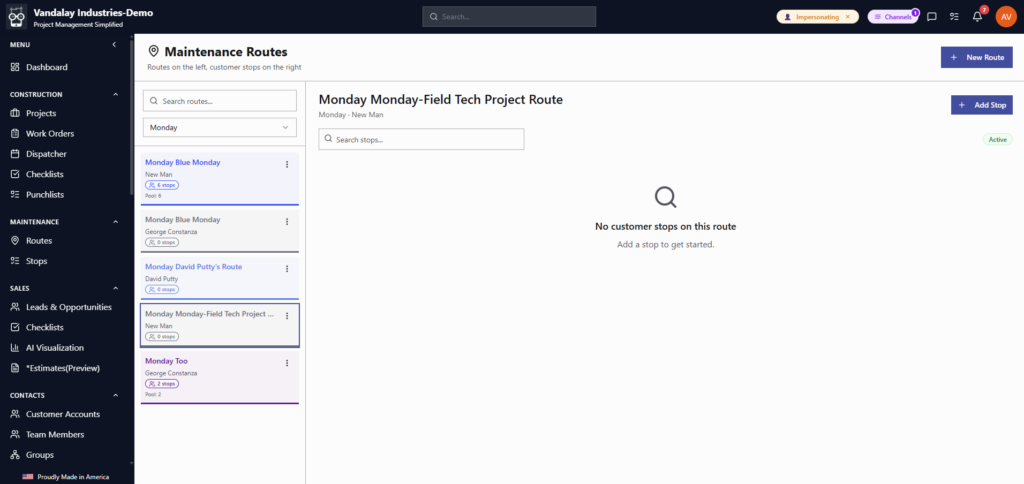
Step 2: Navigate to Maintenance Stops
- From the left sidebar, select Maintenance > Stops.
- Select the scheduled date at the top to match your route’s day of the week.
- Locate your newly created route column (it will currently display 0 stops).
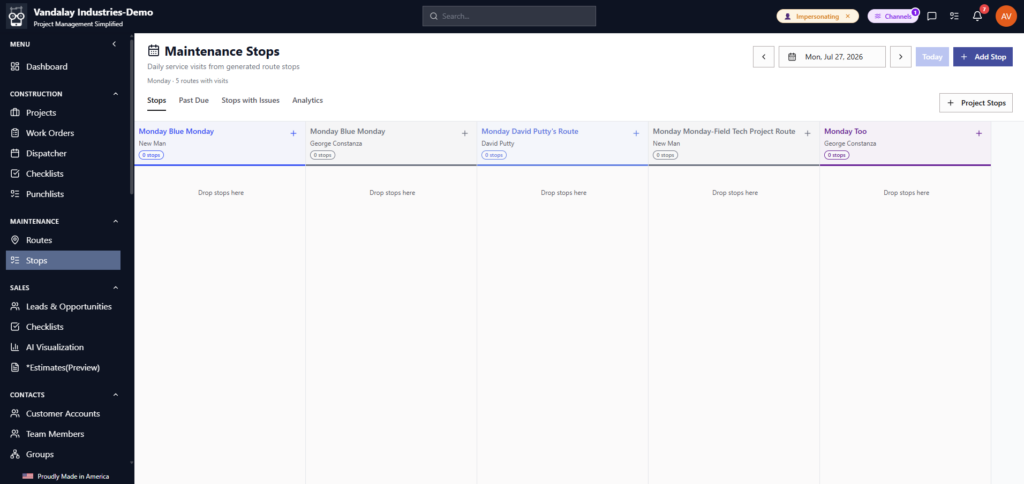
Step 3: Add On-Demand Project Stops
- Click the + Project Stops button in the top right corner of the Maintenance Stops screen (or click the + icon on the specific route column).
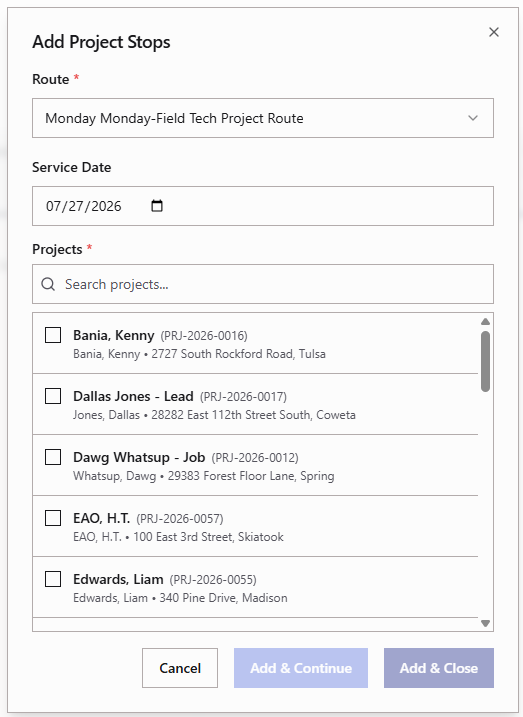
- In the Add Project Stops modal:
- Route: Confirm the target route is selected from the dropdown.
- Service Date: Verify or select the target date.
- Projects: Search for and select the project checkboxes you want to assign to this route.
- Click Add [X] & Close (or Add & Continue if adding more).
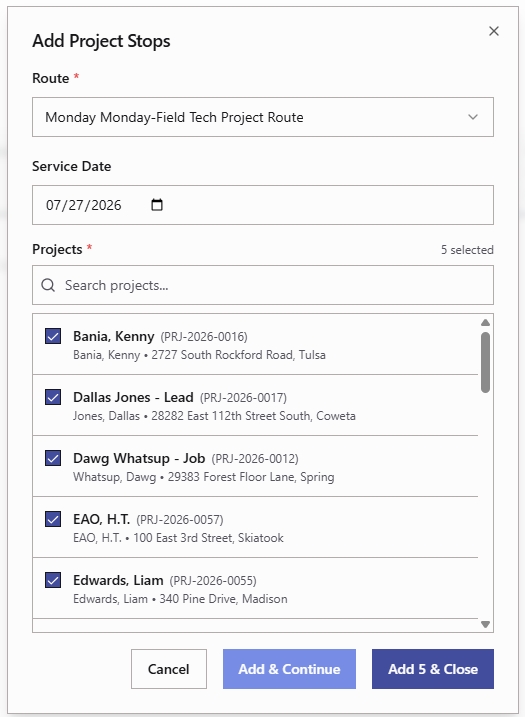
Step 4: Verify Assigned Stops
Once added, the project stops will immediately populate under the technician’s route column on the Maintenance Stops board with a Scheduled status, making them instantly available for the field technician on their mobile app.
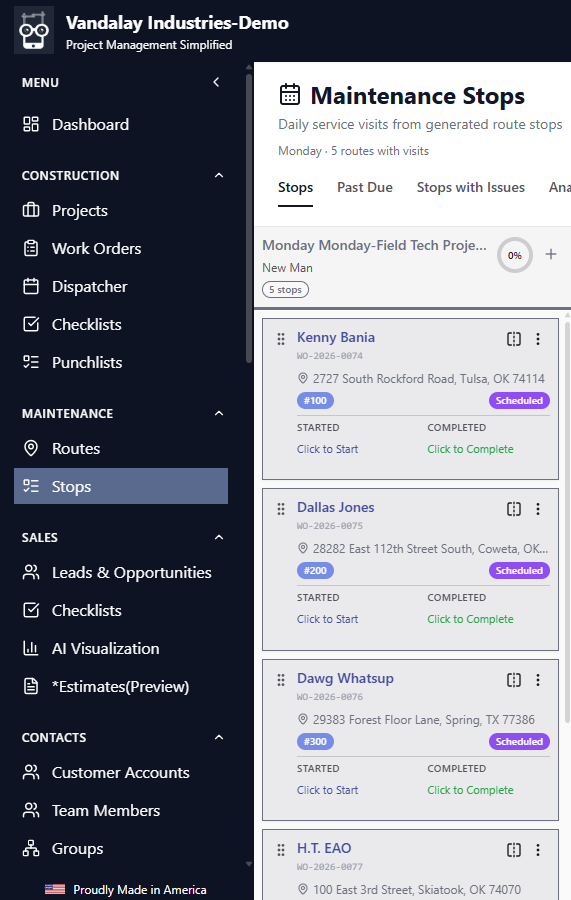
Field Maintenance Tech Mobile App Workflow
This guide details the step-by-step process a Field Maintenance Tech completes in the Pool Builder Geek mobile app when executing scheduled and on-demand route stops.
Step 1: Select a Scheduled Stop
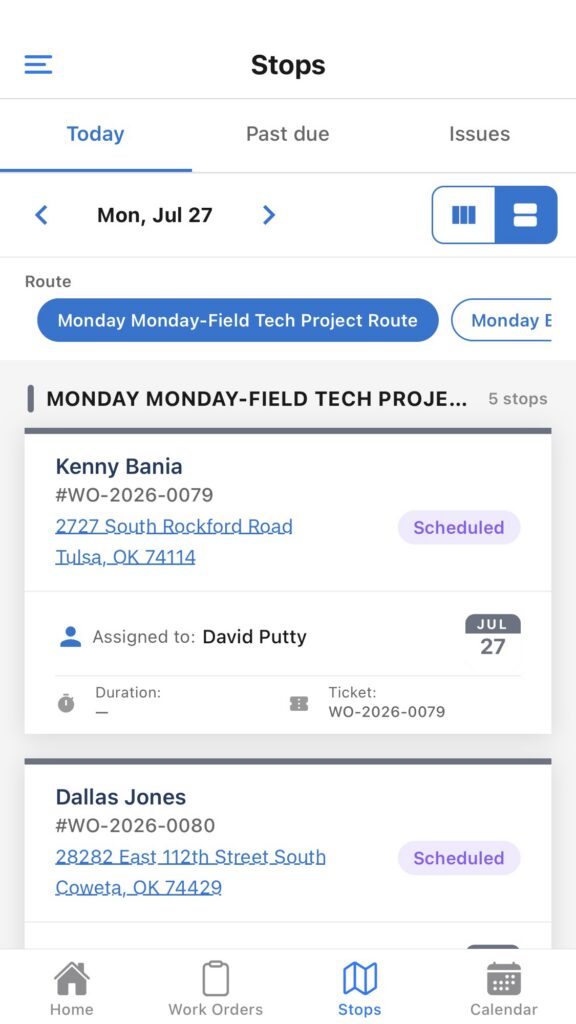
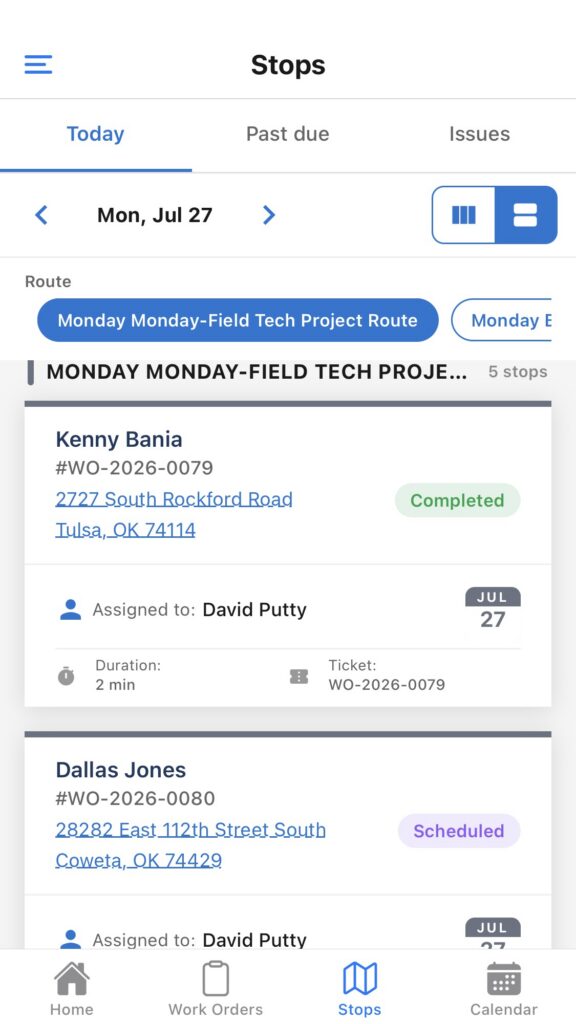
- Open the mobile app and tap Stops on the bottom navigation bar.
- Select your active route for the day (e.g., Monday Monday-Field Tech Project Route).
- Tap on the assigned customer stop (e.g., Kenny Bania) to open Stop Details.
Step 2: Notify Customer & Start Job
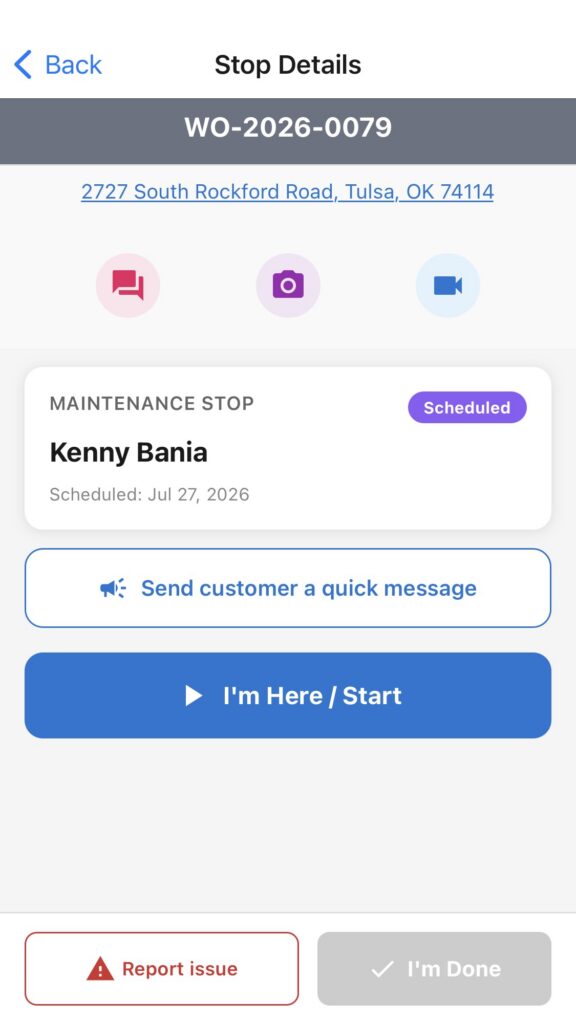
- (Optional) Tap Send customer a quick message to send an automated update (e.g., Customer-Manual Maintenance Stop) notifying them that you are on the way or on site.
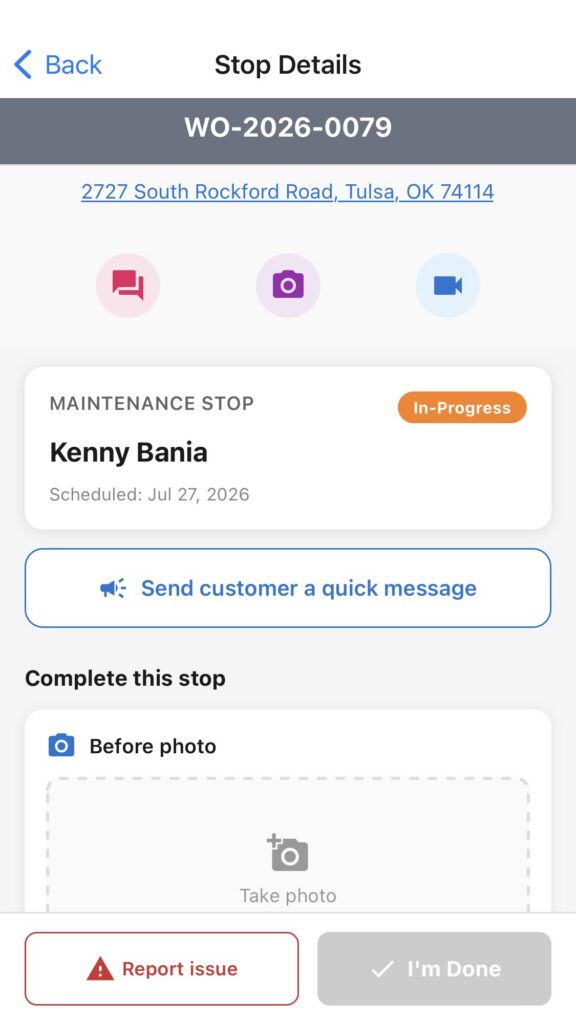
- Tap the blue I’m Here / Start button. This updates the stop status from Scheduled to In-Progress and begins tracking job duration.
Step 3: Capture Required Photos & Document Work
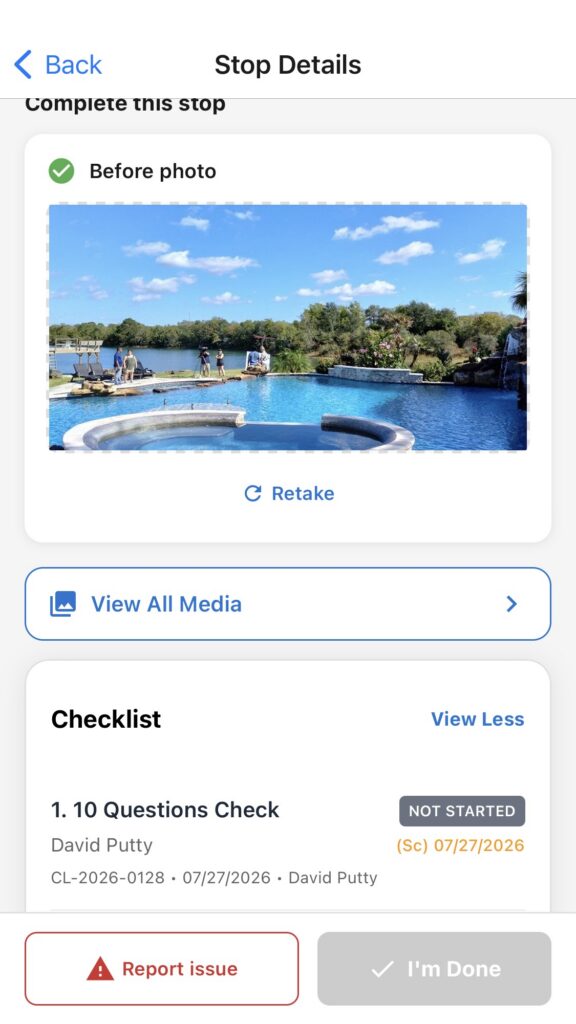
- Under Complete this stop, tap Take photo in the Before photo section to capture site conditions prior to starting work.
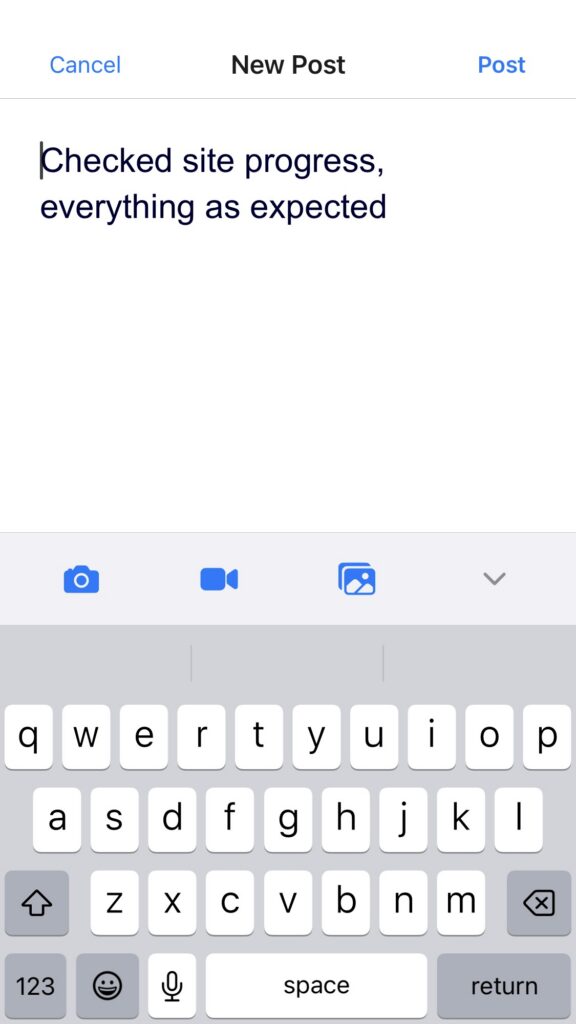
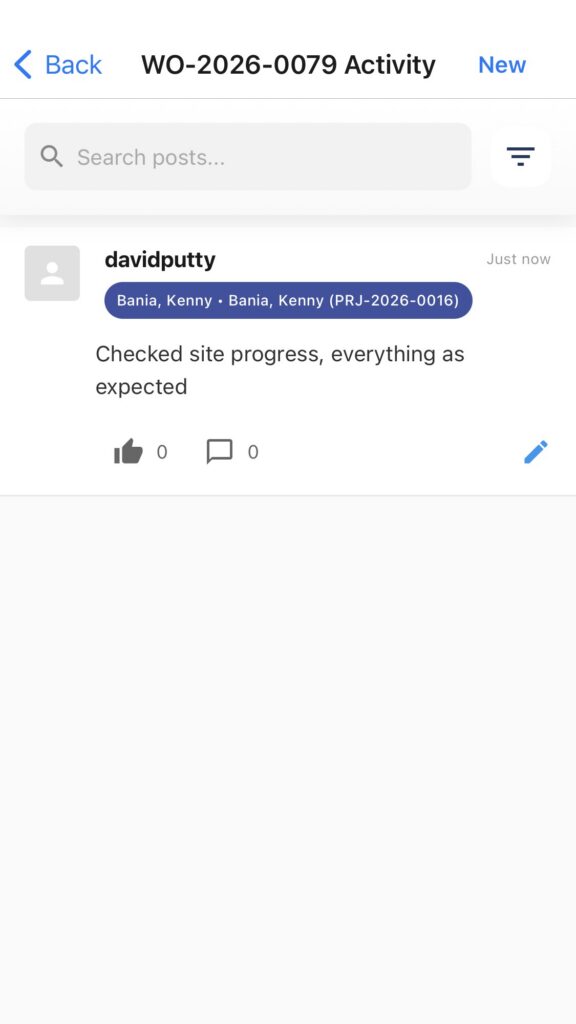
- (Optional Activity Notes) Tap the Activity / Chat icon at the top of the screen to add site progress notes (e.g., “Checked site progress, everything as expected”) and post updates directly to the project log.
Step 4: Complete Checklist Items & After Photo
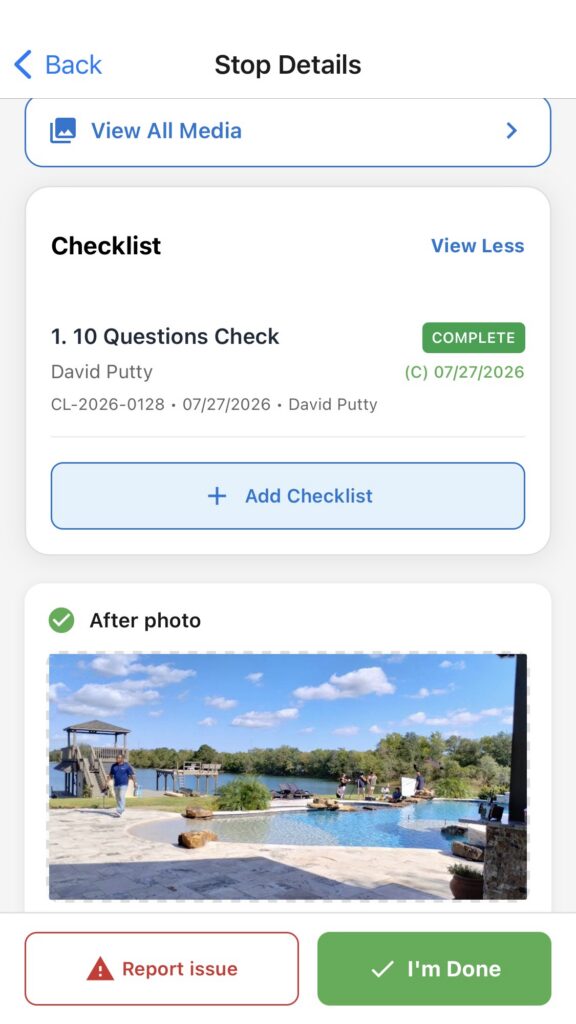
- Scroll down to the Checklist section and complete all assigned tasks (e.g., 10 Questions Check). The status will update to COMPLETE.
- Tap Take photo under the After photo section to document completed work.
Step 5: Finish & Complete Stop
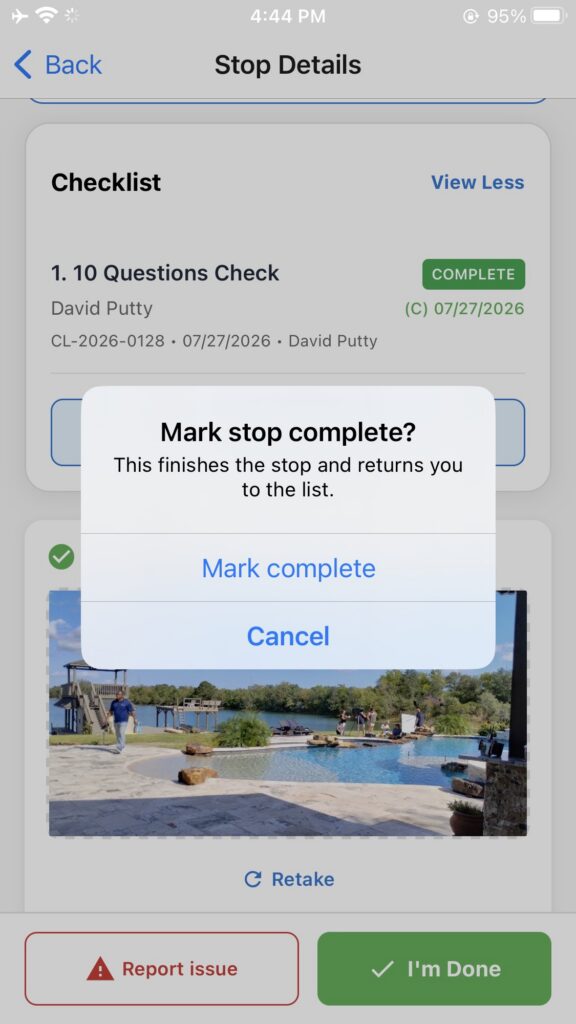
- Tap the green I’m Done button at the bottom of the screen.
- When prompted with “Mark stop complete?”, tap Mark complete.
- The app will return you to your main Stops list, marking the completed stop as Completed with total duration logged, ready for you to proceed to the next stop!
Reviewing Route Progress from the Web Portal
This details how admins and project managers can monitor real-time route progress, view uploaded media, and inspect activity logs as field technicians complete their stops.
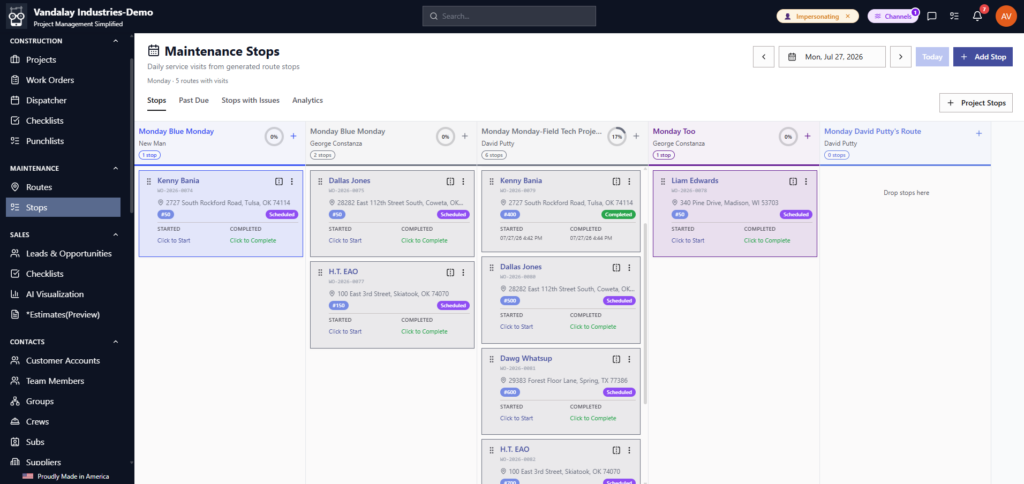
Step 1: Navigate to the Maintenance Stops Board
- In the left menu under MAINTENANCE, click on Stops.
- Select the date you want to review using the date selector at the top right (e.g., Mon, Jul 27, 2026).
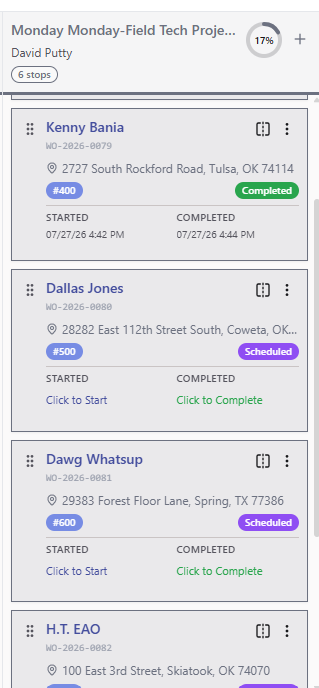
Step 2: Monitor Real-Time Progress Across Routes
- Review the progress percentage indicators at the top of each route column (e.g., 17% completed for Monday Field Tech Project Route).
- Individual stop cards will update automatically as technicians work:
- Scheduled (Purple): Stops pending completion.
- Completed (Green): Stops finished by the field tech, showing precise STARTED and COMPLETED timestamps.
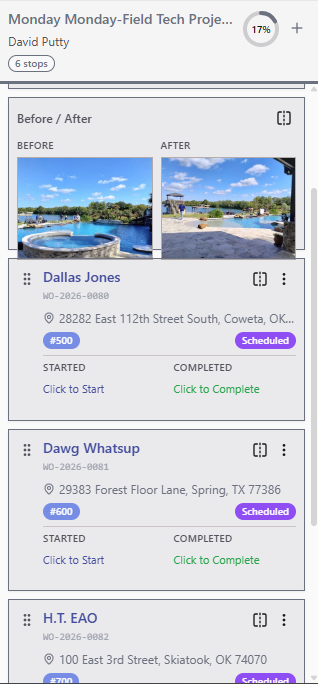
Step 3: Quick-View Before/After Media
- On any completed stop card, click the Flip / Media Icon ([ ]) in the top right of the card.
- The card will expand/flip to display the Before and After photos submitted directly by the technician in the field.
Step 4: Inspect Full Visit Details & Activity
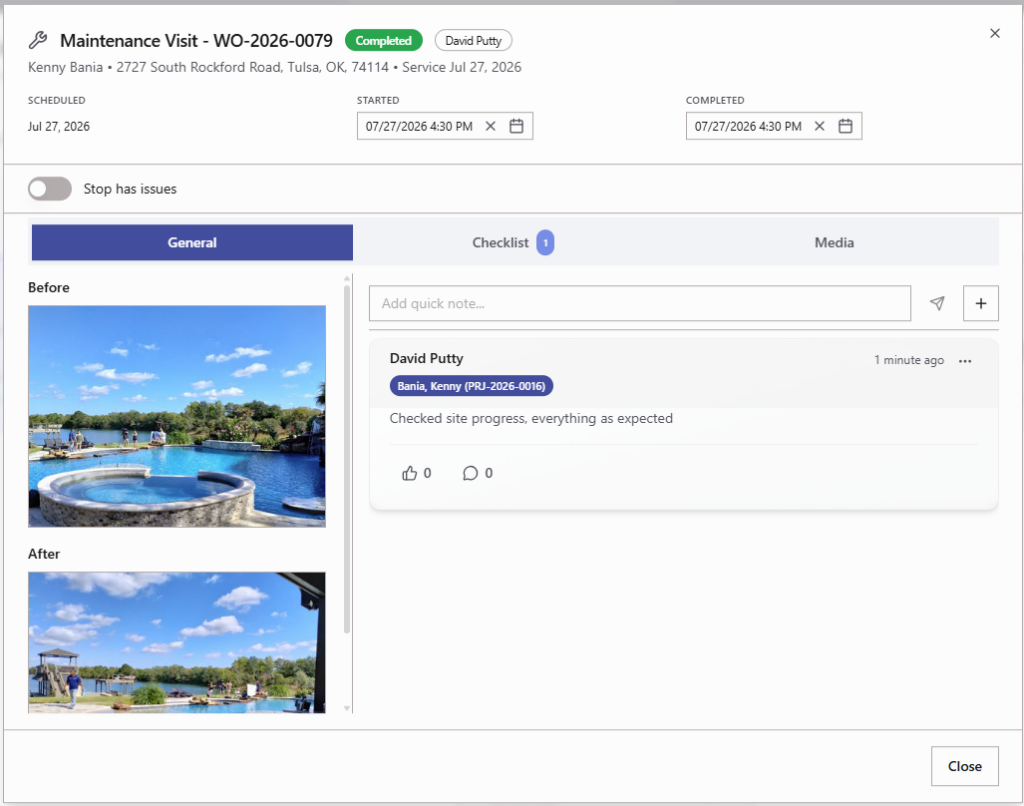
- Click directly on a stop card (or its work order number, e.g., WO-2026-0079) to open the Maintenance Visit modal.
- From this detailed view, an admin can:
- General Tab: View uploaded Before/After photos alongside real-time activity updates posted by the field tech (e.g., “Checked site progress, everything as expected”).
- Checklist Tab: Inspect completed checklist responses.
- Media Tab: Access all media uploaded during the visit.
- Timestamps & Flags: Edit start/completion timestamps or toggle Stop has issues if follow-up is required.