Help Center
Checklists
How to Assign and Manage Checklists in the Web Portal
The Checklists feature in Pool Builder Geek allows you to assign, track, and complete standardized templates for your projects and tasks. This guide walks you through the process of assigning a new checklist and updating its status.
Navigating to Checklists
To view and manage all active checklists:
- Navigate to the left-hand menu.
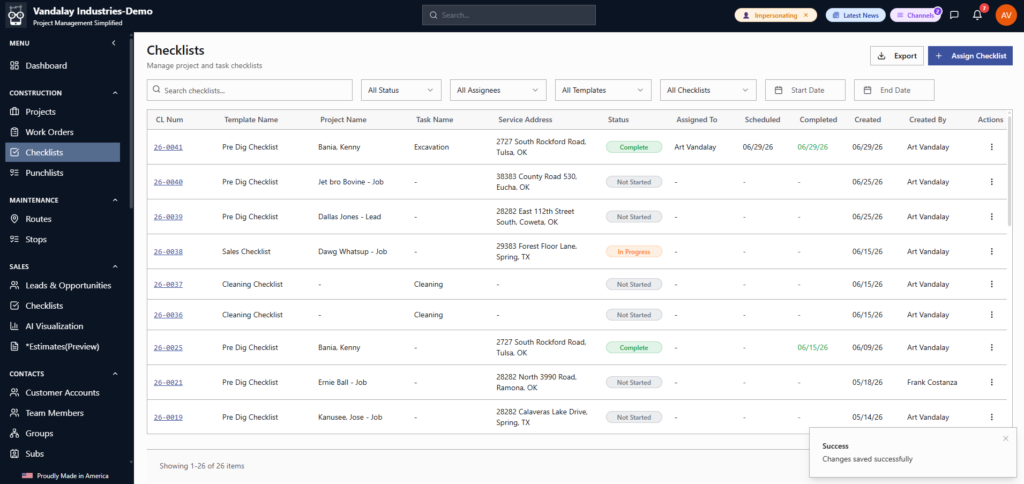
- Under the CONSTRUCTION category, click on Checklists. (For Sales checklists, they are accessed by going to Sales>Checklists)
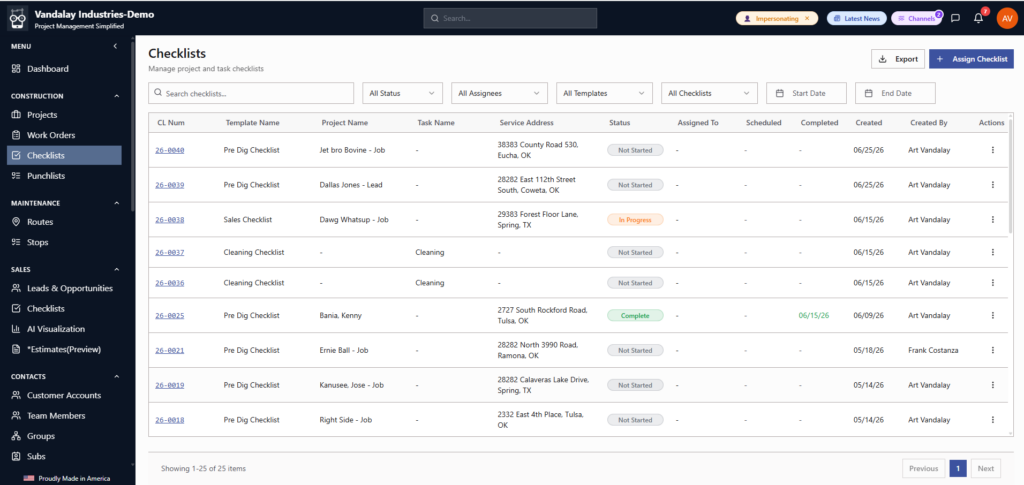
- This opens the main Checklists dashboard, where you can view all checklists sorted by status, assignee, template, and date.
Assigning a New Checklist

To assign a checklist to a specific project or task:
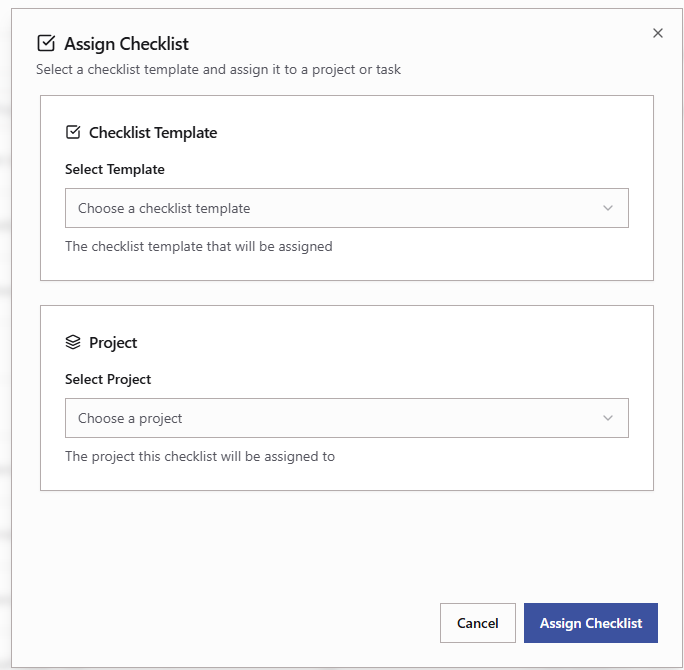
- From the Checklists dashboard, click the blue + Assign Checklist button in the top right corner.
- In the Assign Checklist window, click the Select Template dropdown and choose the appropriate template (e.g., “Pre Dig Checklist”).
- Under the Project section, click the dropdown to select the target project.
- (Optional) If the checklist applies to a specific phase, use the Task/Phase (Optional) dropdown to select the relevant phase, such as “Excavation”.
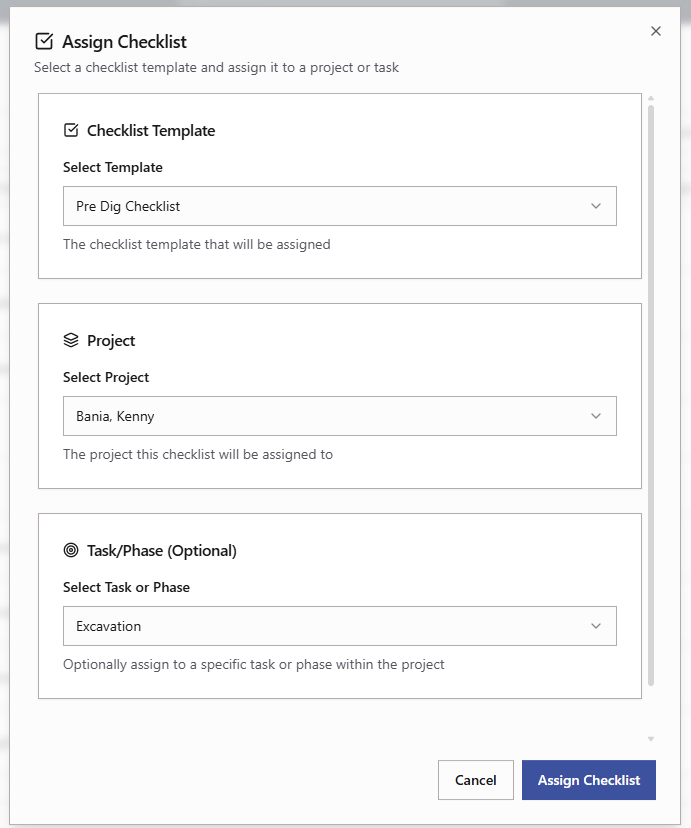
5. Click the blue Assign Checklist button to proceed.
Editing and Completing a Checklist
Fromt the Checklists grid, click on Checklists Number (CL Num) to view/edit the selected checklist:

- In the Edit Checklist window, you can configure the administrative details at the top:
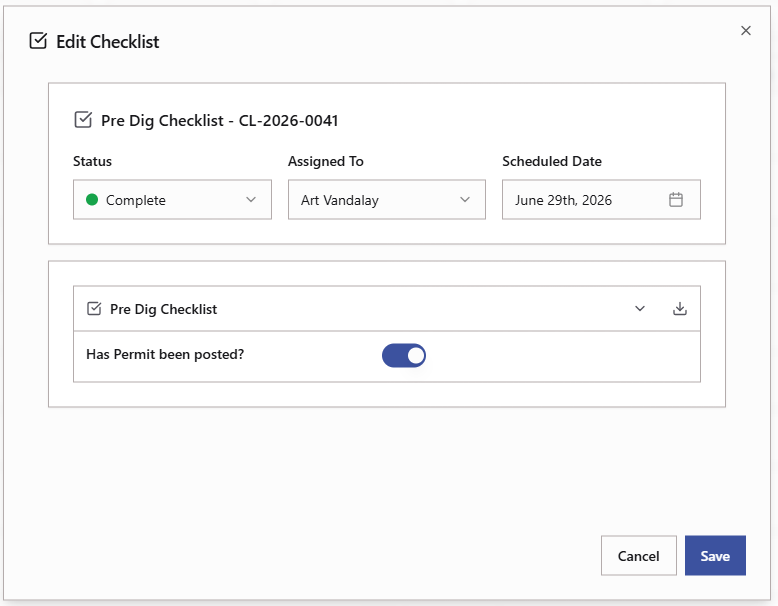
- Status: Click the dropdown to update the progress (e.g., change from “Not Started” to “Complete”).
- Assigned To: Select the team member responsible for this checklist.
- Scheduled Date: Use the calendar picker to assign a due date.
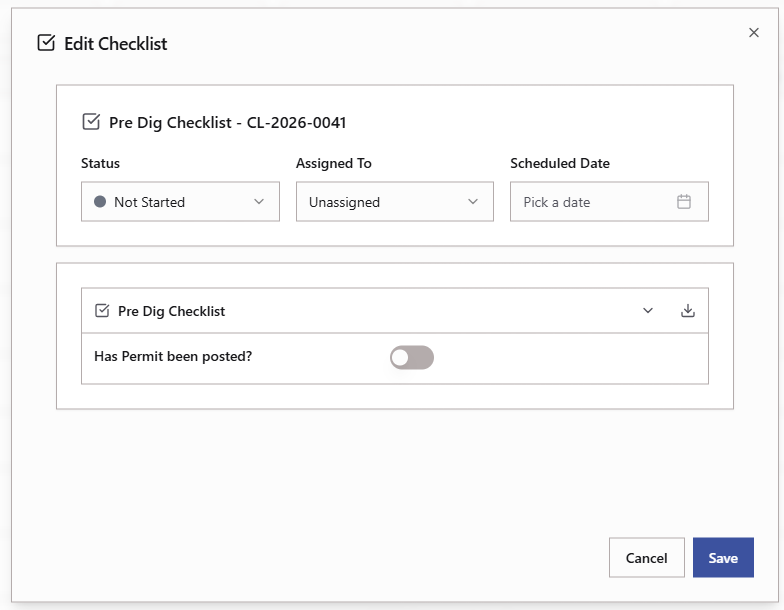
- Below the administrative details, work through the individual checklist items. For example, click the toggle switch to confirm items like “Has Permit been posted?”
- Once the necessary fields are updated and the toggle switches are activated (they will turn blue), click the blue Save button in the bottom right corner.
Verifying Saved Changes
After saving, you will be returned to the main Checklists dashboard.
- A pop-up notification will appear in the bottom right corner stating, “Success: Changes saved successfully.”
- Your newly assigned checklist will now appear at the top of the dashboard list, reflecting the updated status, assignee, and completion date.