Messaging & Notifications
Download this Setup Guide
The Messaging screen allows you to standardize the messages sent to customers, subcontractors, and internal staff based on specific project triggers or manual actions.
The dashboard is divided into two primary tabs for managing your communication strategy:
- Templates Tab: Use this area to build and edit the content of your messages.
- Message Queue Tab: Use this area to monitor the status of sent messages or those pending delivery.
The Mine tab shows the message in your organization
The Library tab shows available system templates available to be copied to your organization.
Template Management Table
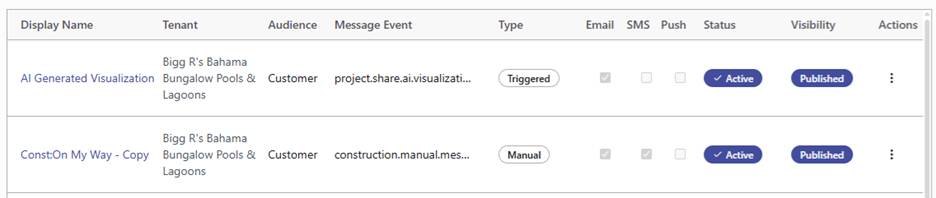
The main table provides a detailed overview of your active message templates:
| Column | Description |
| Display Name | The internal name of the message template. |
| Audience | Who receives the message (e.g., Customer, Task Owner, or Sales). |
| Message Event | The specific action that triggers the message (e.g., “construction.phase.assigned”). |
| Type | Indicates if the message is Triggered automatically by the system or sent Manually. |
| Channels | Checkboxes indicating if the template is configured for Email, SMS, or Push notifications. |
| Status/Visibility | Shows if the template is currently Active and Published for use. |
- Create New Template: Click the blue + Add Template button in the top-right corner to start building a new communication workflow.
- Edit Existing Messages: Use the three-dot action menu on the far right of any template row to modify the content, change the audience, or adjust the trigger events.
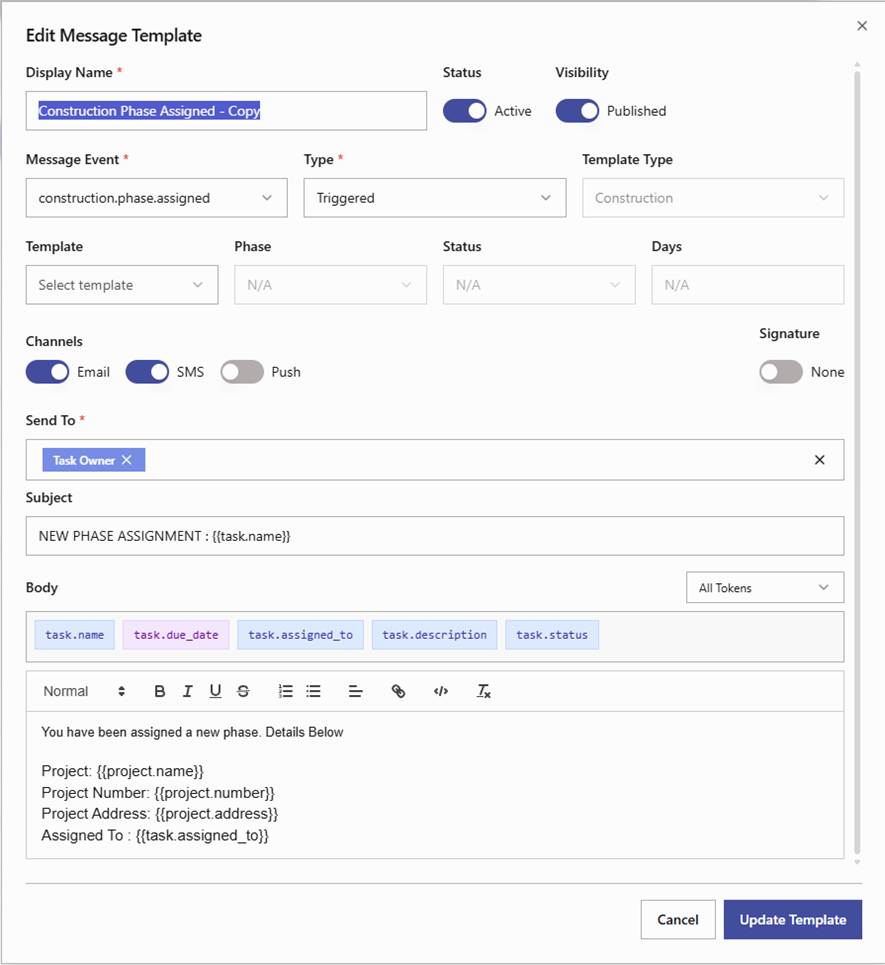
The Edit Message Template window (or setup window) allows you to configure exactly how and when automated or manual communications are sent to your customers, staff, and partners. By utilizing dynamic tokens, you can create personalized messages that automatically pull in relevant project data.
Basic Template Information:
Display Name: Assign a clear, internal name to help you identify the template in your dashboard (e.g., “Construction Phase Assigned”).
Status & Visibility: Use the toggles to mark the template as Active or Inactive and determine if it is Published for use across the organization.
Template Type: (e.g., Construction or Sales).
Message Event: Select the specific system action that initiates the message, such as construction.phase.assigned.
Type: Define if the message is Triggered (sent automatically by the system) or Manual (sent by a user action).
Channels: Choose the delivery methods by toggling Email, SMS, or Push notifications.
Send To: Designate the recipient group, such as the Task Owner, Customer, or Sales team.
Subject: Create a compelling subject line. You can use tokens like {{task.name}} to make the subject dynamic.
Tokens (Dynamic Data): The window provides a library of data placeholders (e.g., task.name, task.due_date, task.assigned_to).
Body Editor: A full rich-text editor allows you to format your message with bolding, lists, and links. You can build out clear templates that include project names, numbers, and addresses using the available message tokens.
Signature: Optionally toggle a standardized signature to be appended to the bottom of the message.
Update/Create Template: Click the blue button at the bottom right to save your configuration and activate the message workflow.